
Creating a Site With Hugo
Today we will get a bit more technical on how. I will write in a tutorial-like fashion, so if you never used Hugo and want to attempt it out, please follow along.
Read More
Now that we have created a beautiful site, why not show it off. Like the title says we will use Github and Netlify. So you’ll need to create accounts on both sites.
Continuous deployment aims to minimize lead time, the time between writing something and this being seen by users, in production. For us, that means, every time we push to our Git repository. Netlify will automagically pick up on the changes and constructs a new version of our site, and deploy it.
Git, for use with Github, comes with Osx but if you are using another OS or having trouble with it head over to “Getting Started”. Open the terminal and head to the root of our site. There we initialize our Git repository
| |
with a response like
| |
Add all the files we created.
| |
and then commit them
| |
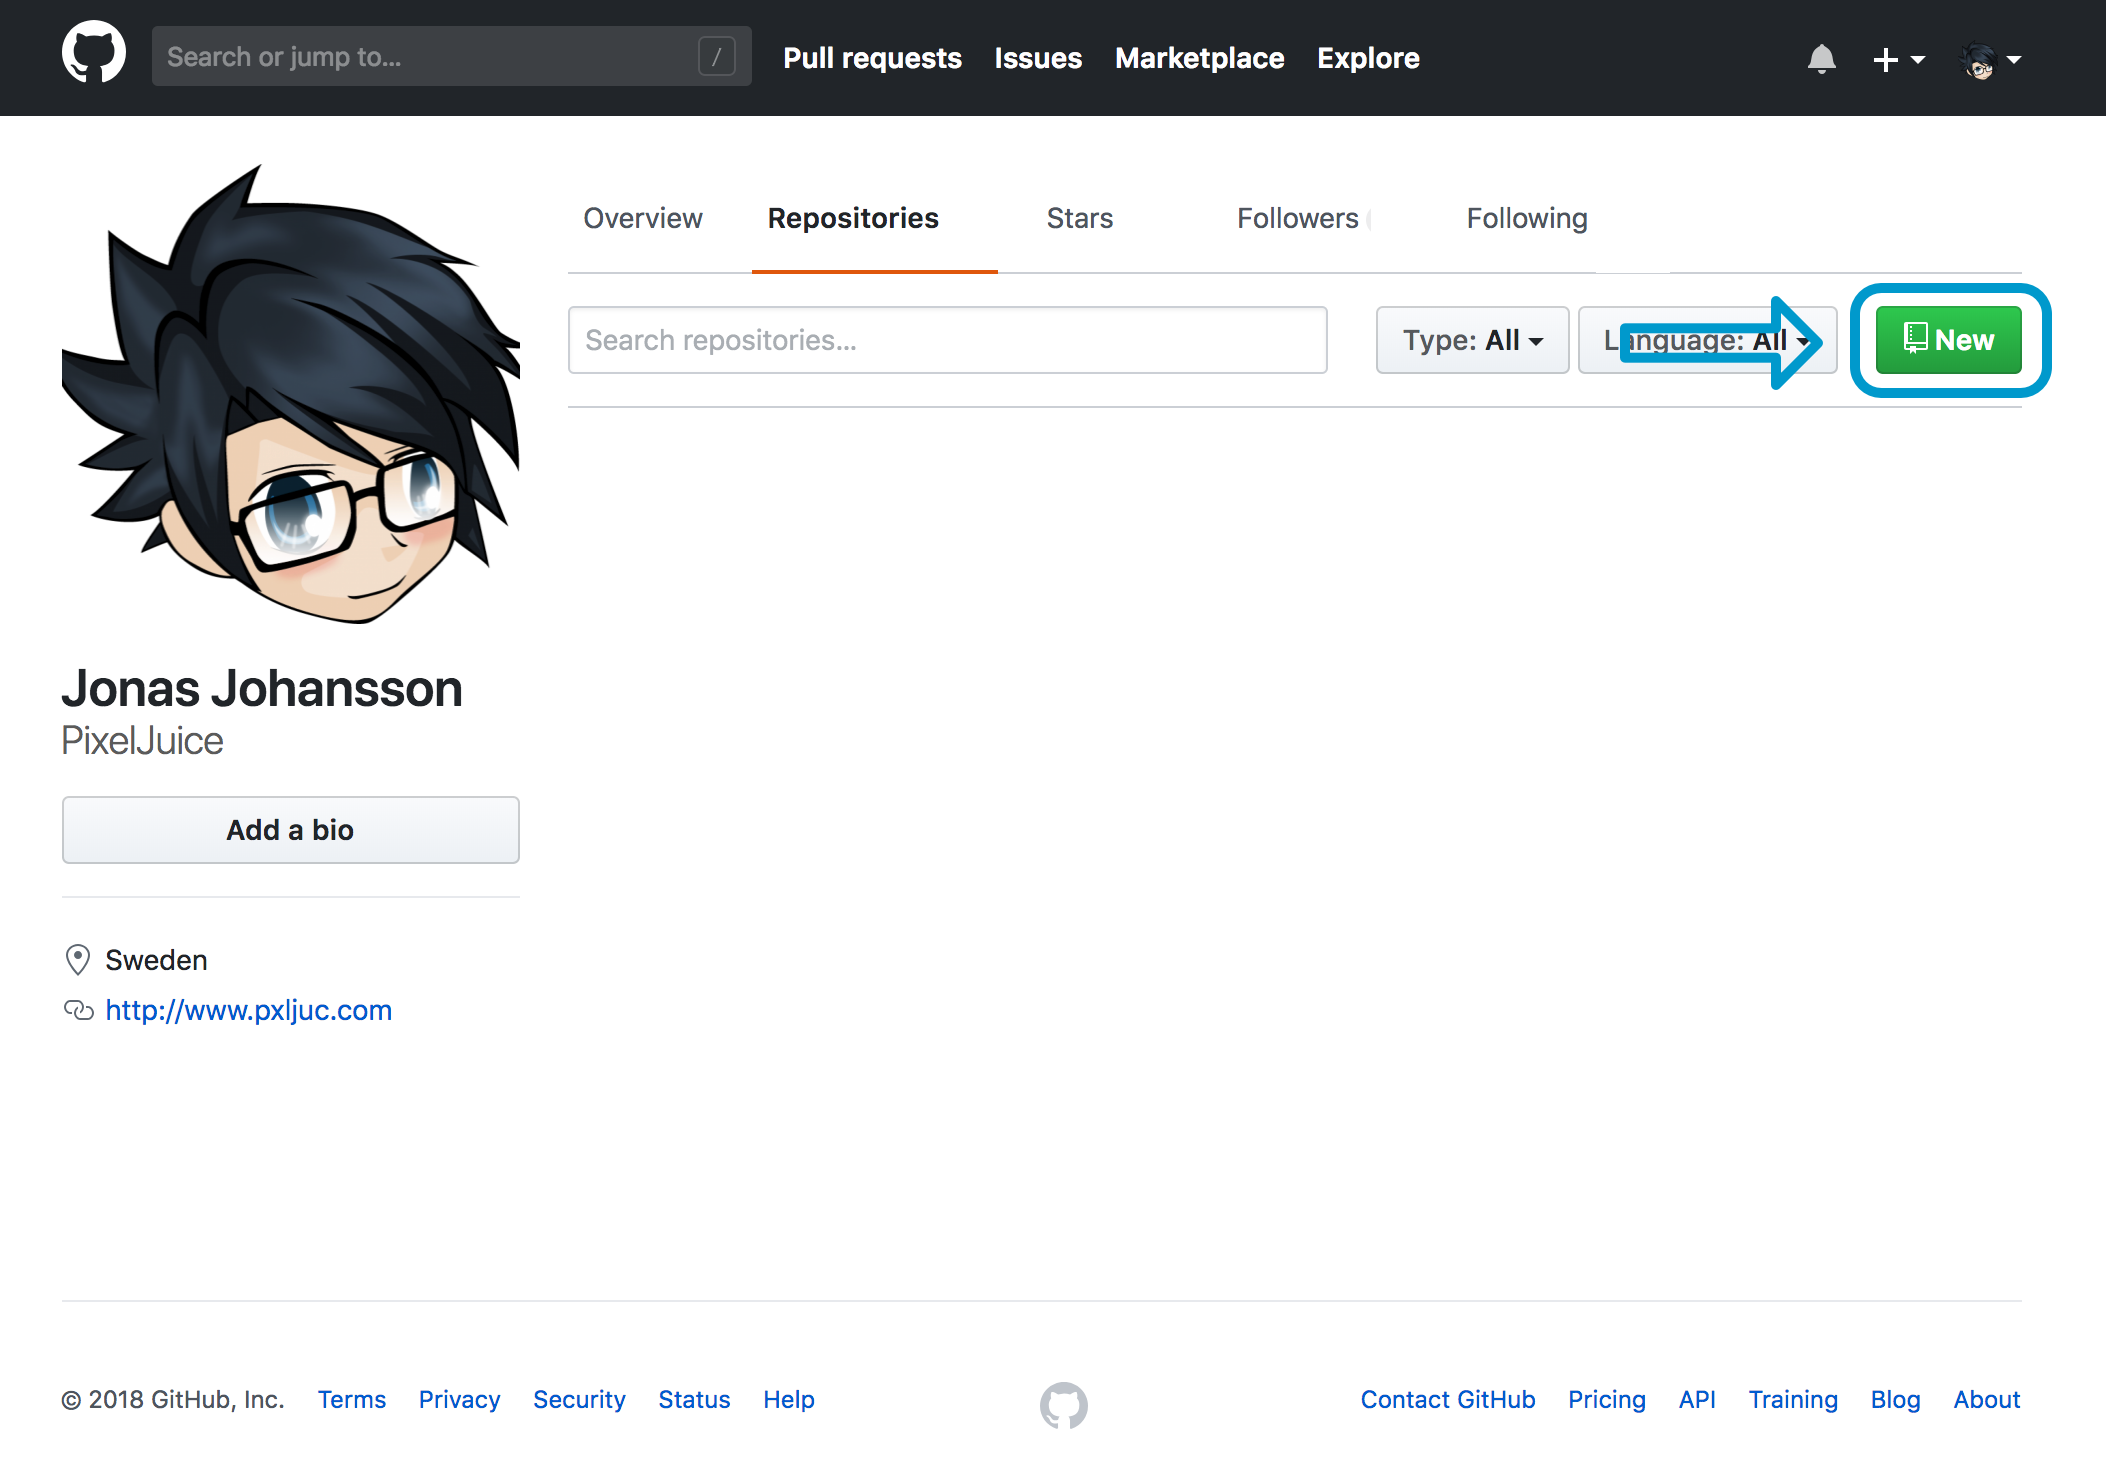
Then we connect it to Github. Login to your account and go to your repositories.
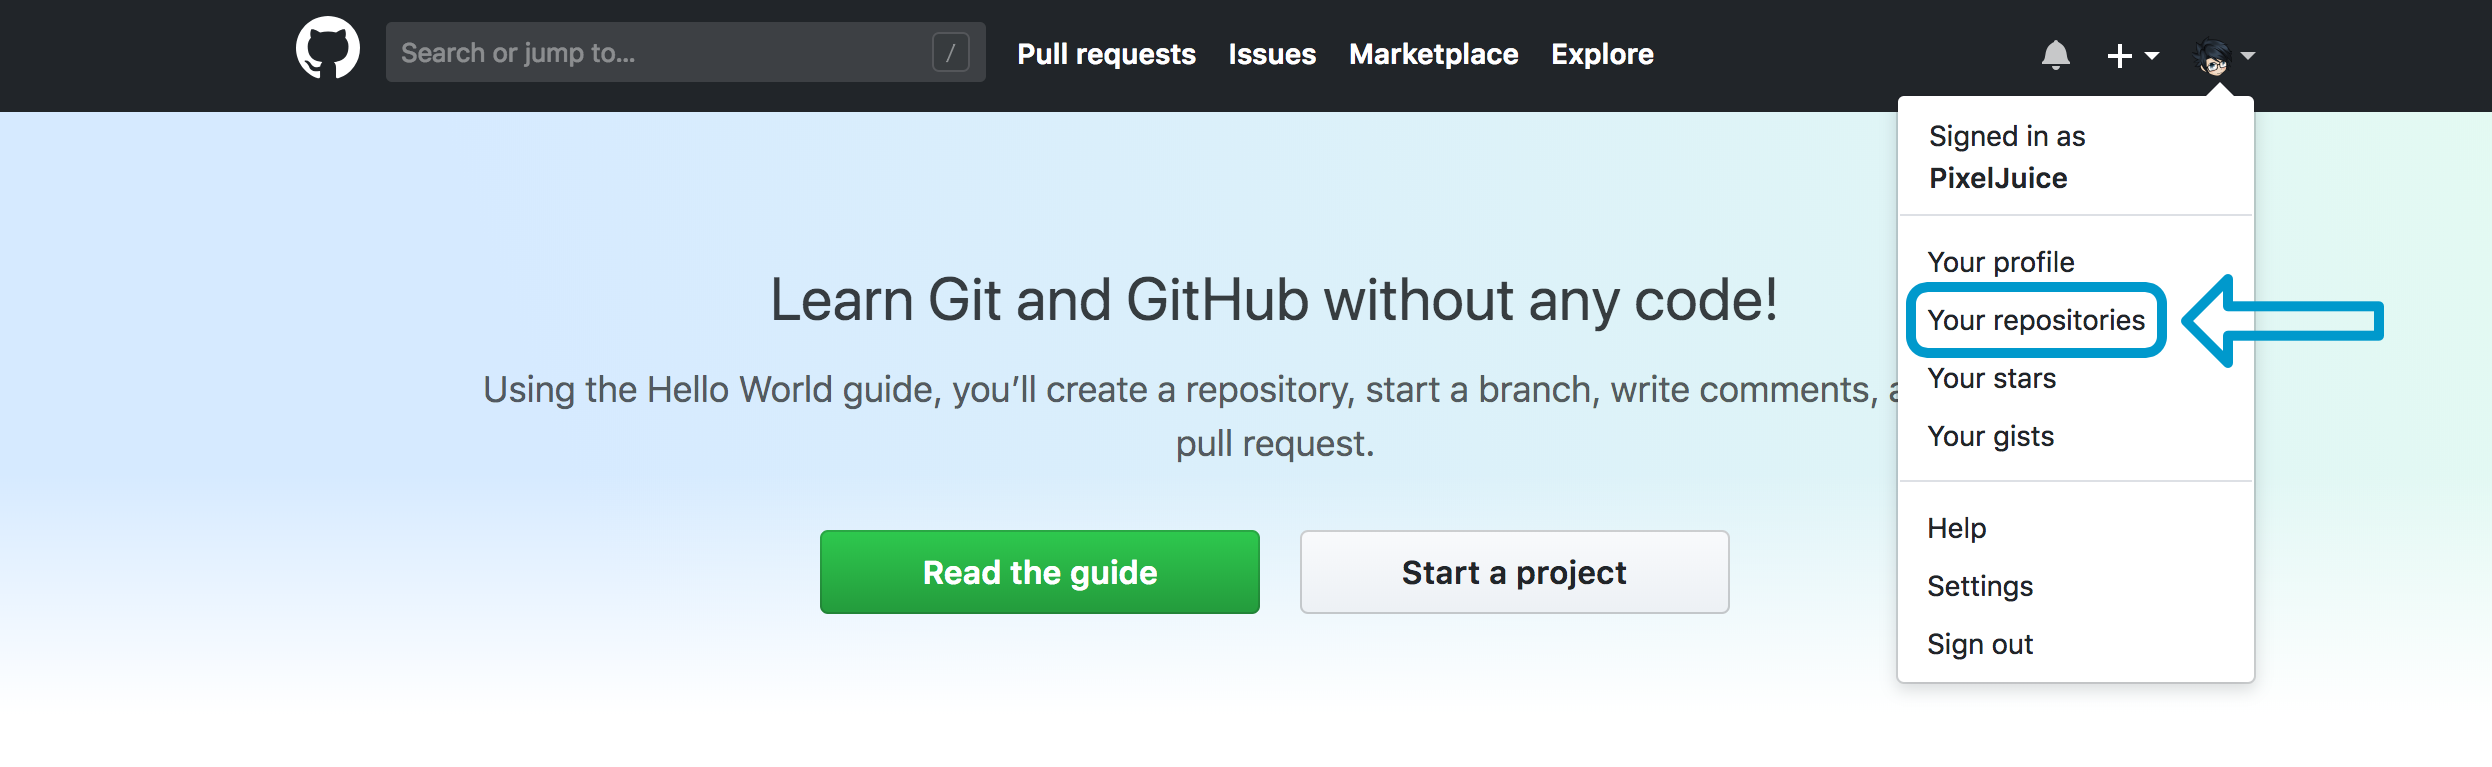
Followed by “New”
Fill in your details and hit “Create repository”.
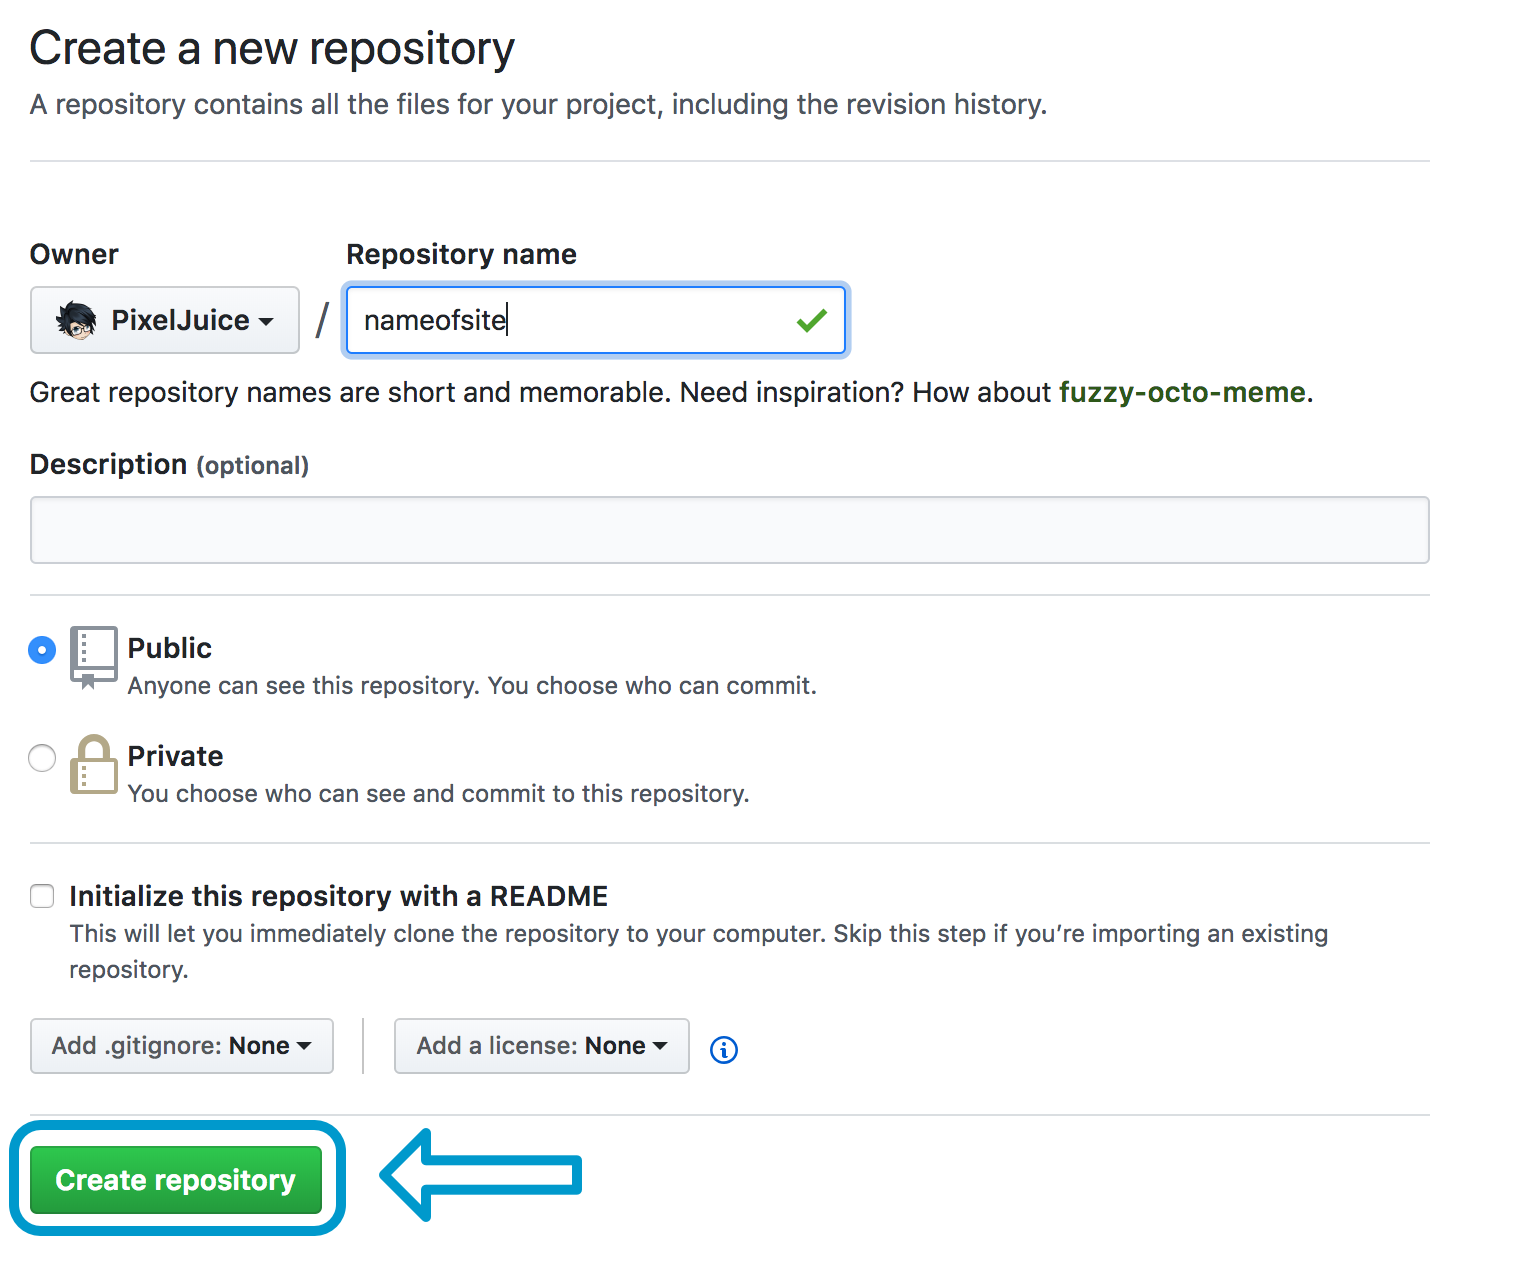
Since we already created our local repository, we only need to “push to an existing repository.”
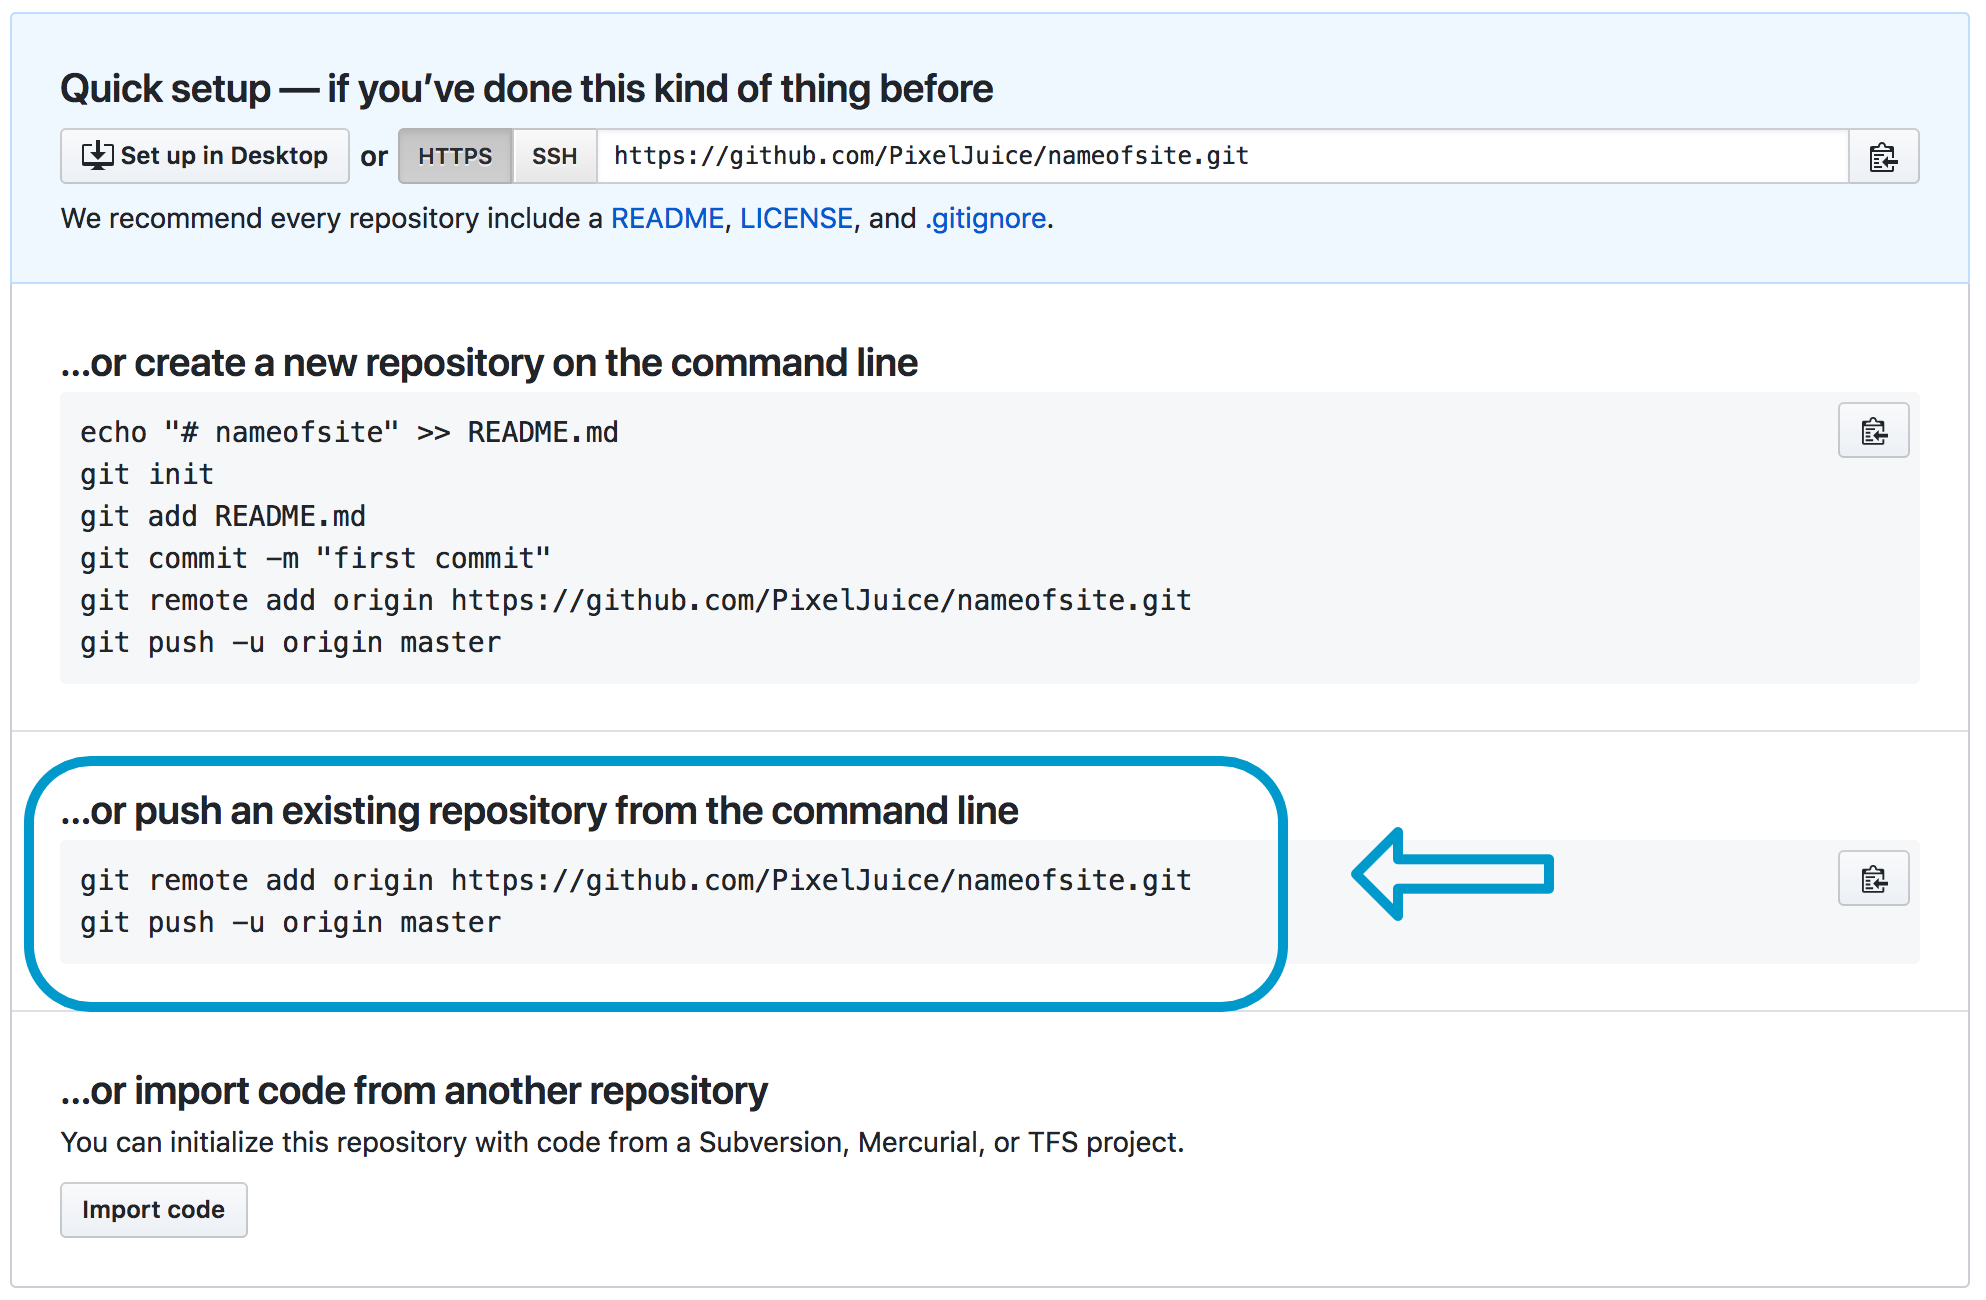
Back to the terminal and input
| |
followed by
| |
that’s it, now each time we do
| |
we will push to Github where all our files will be safe, public, but safe. (edit: Github now allows private repositories, so consider switching it to private)
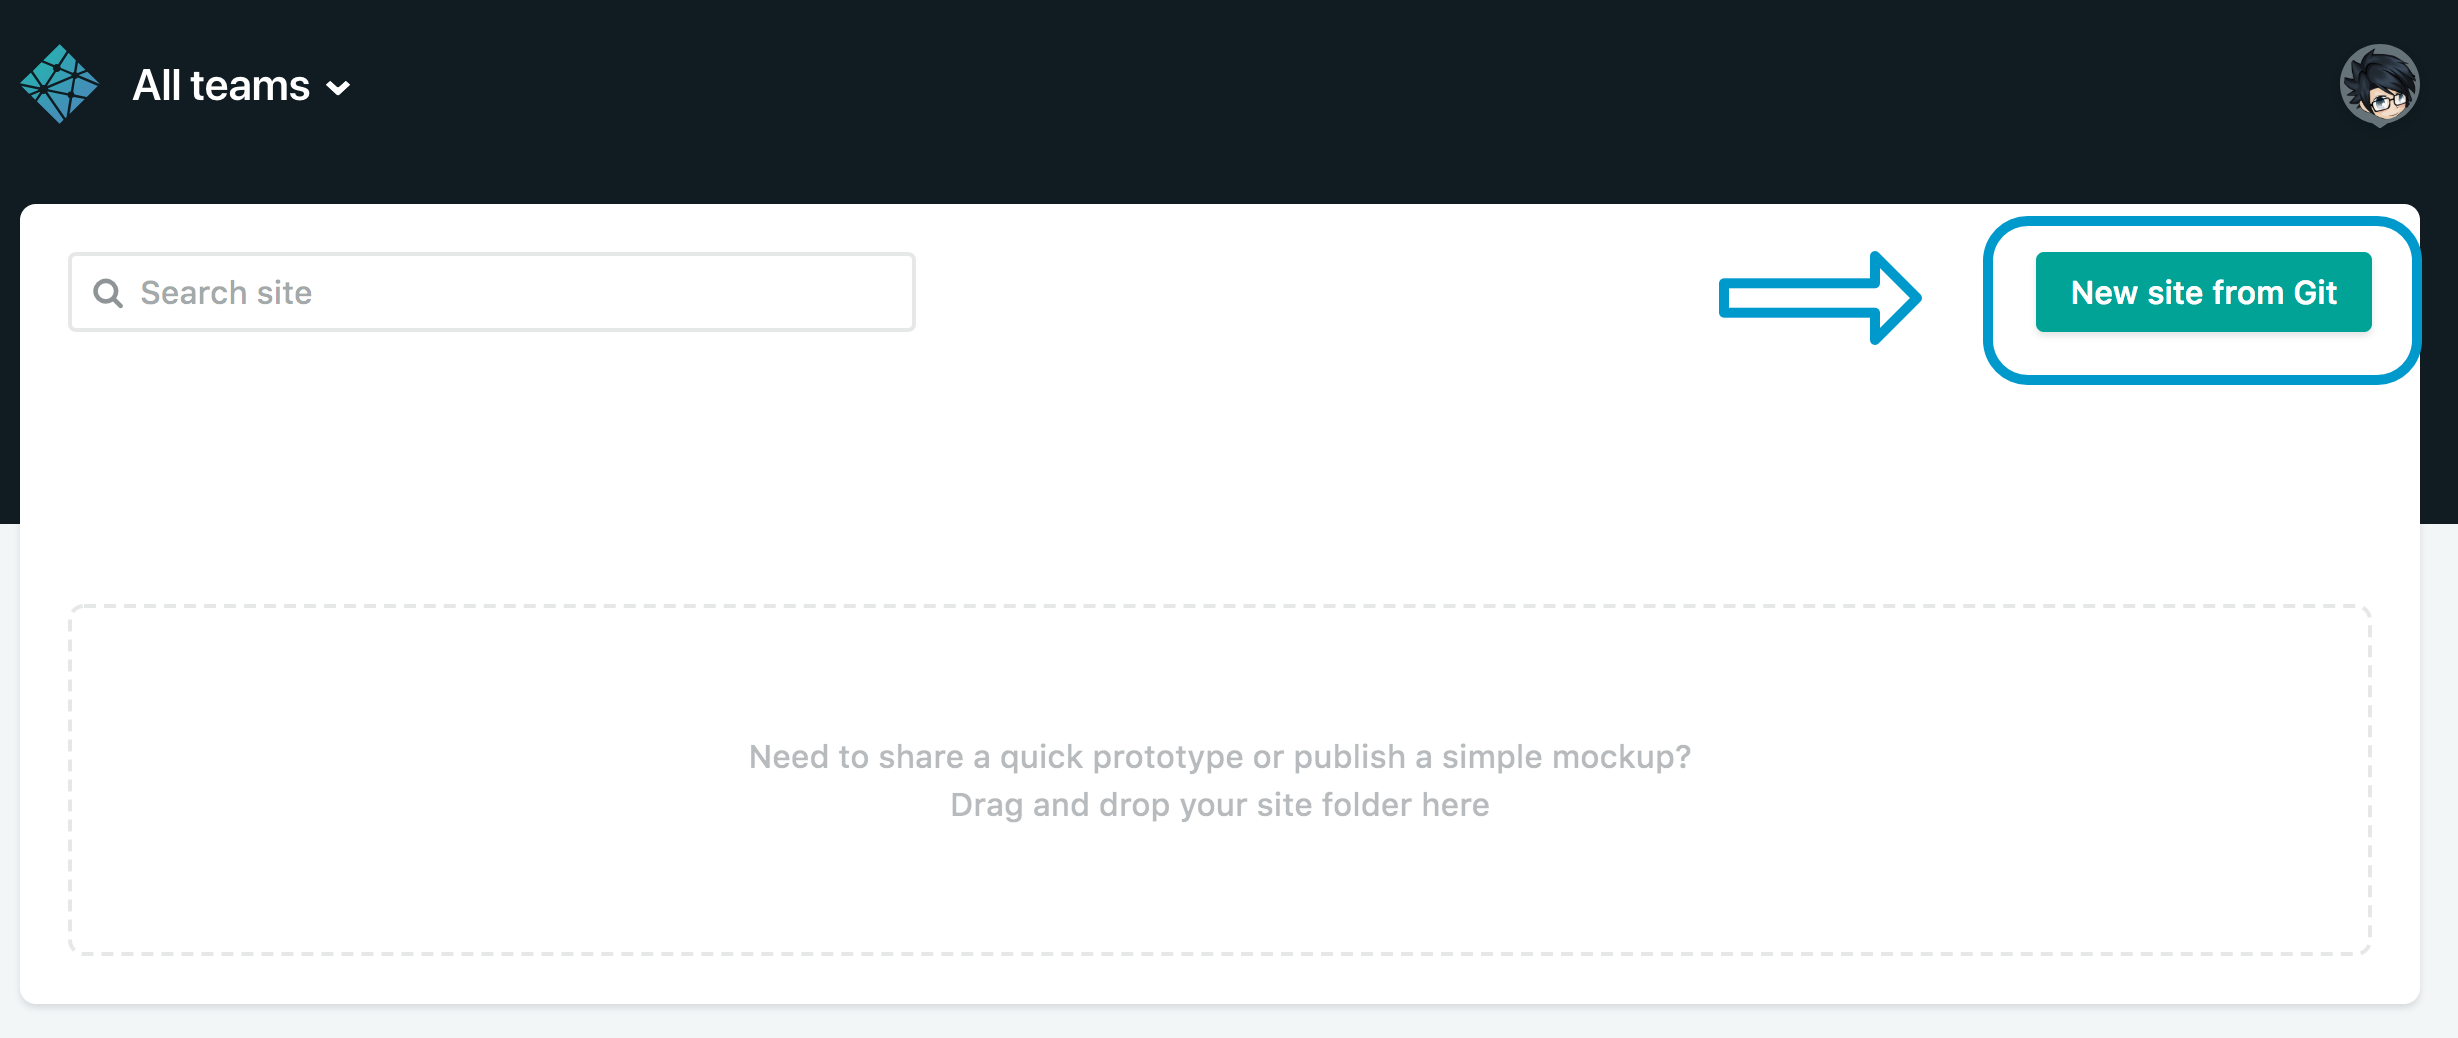
Head over to Netlify and login. You will find a button to create “New site from Git” press it.
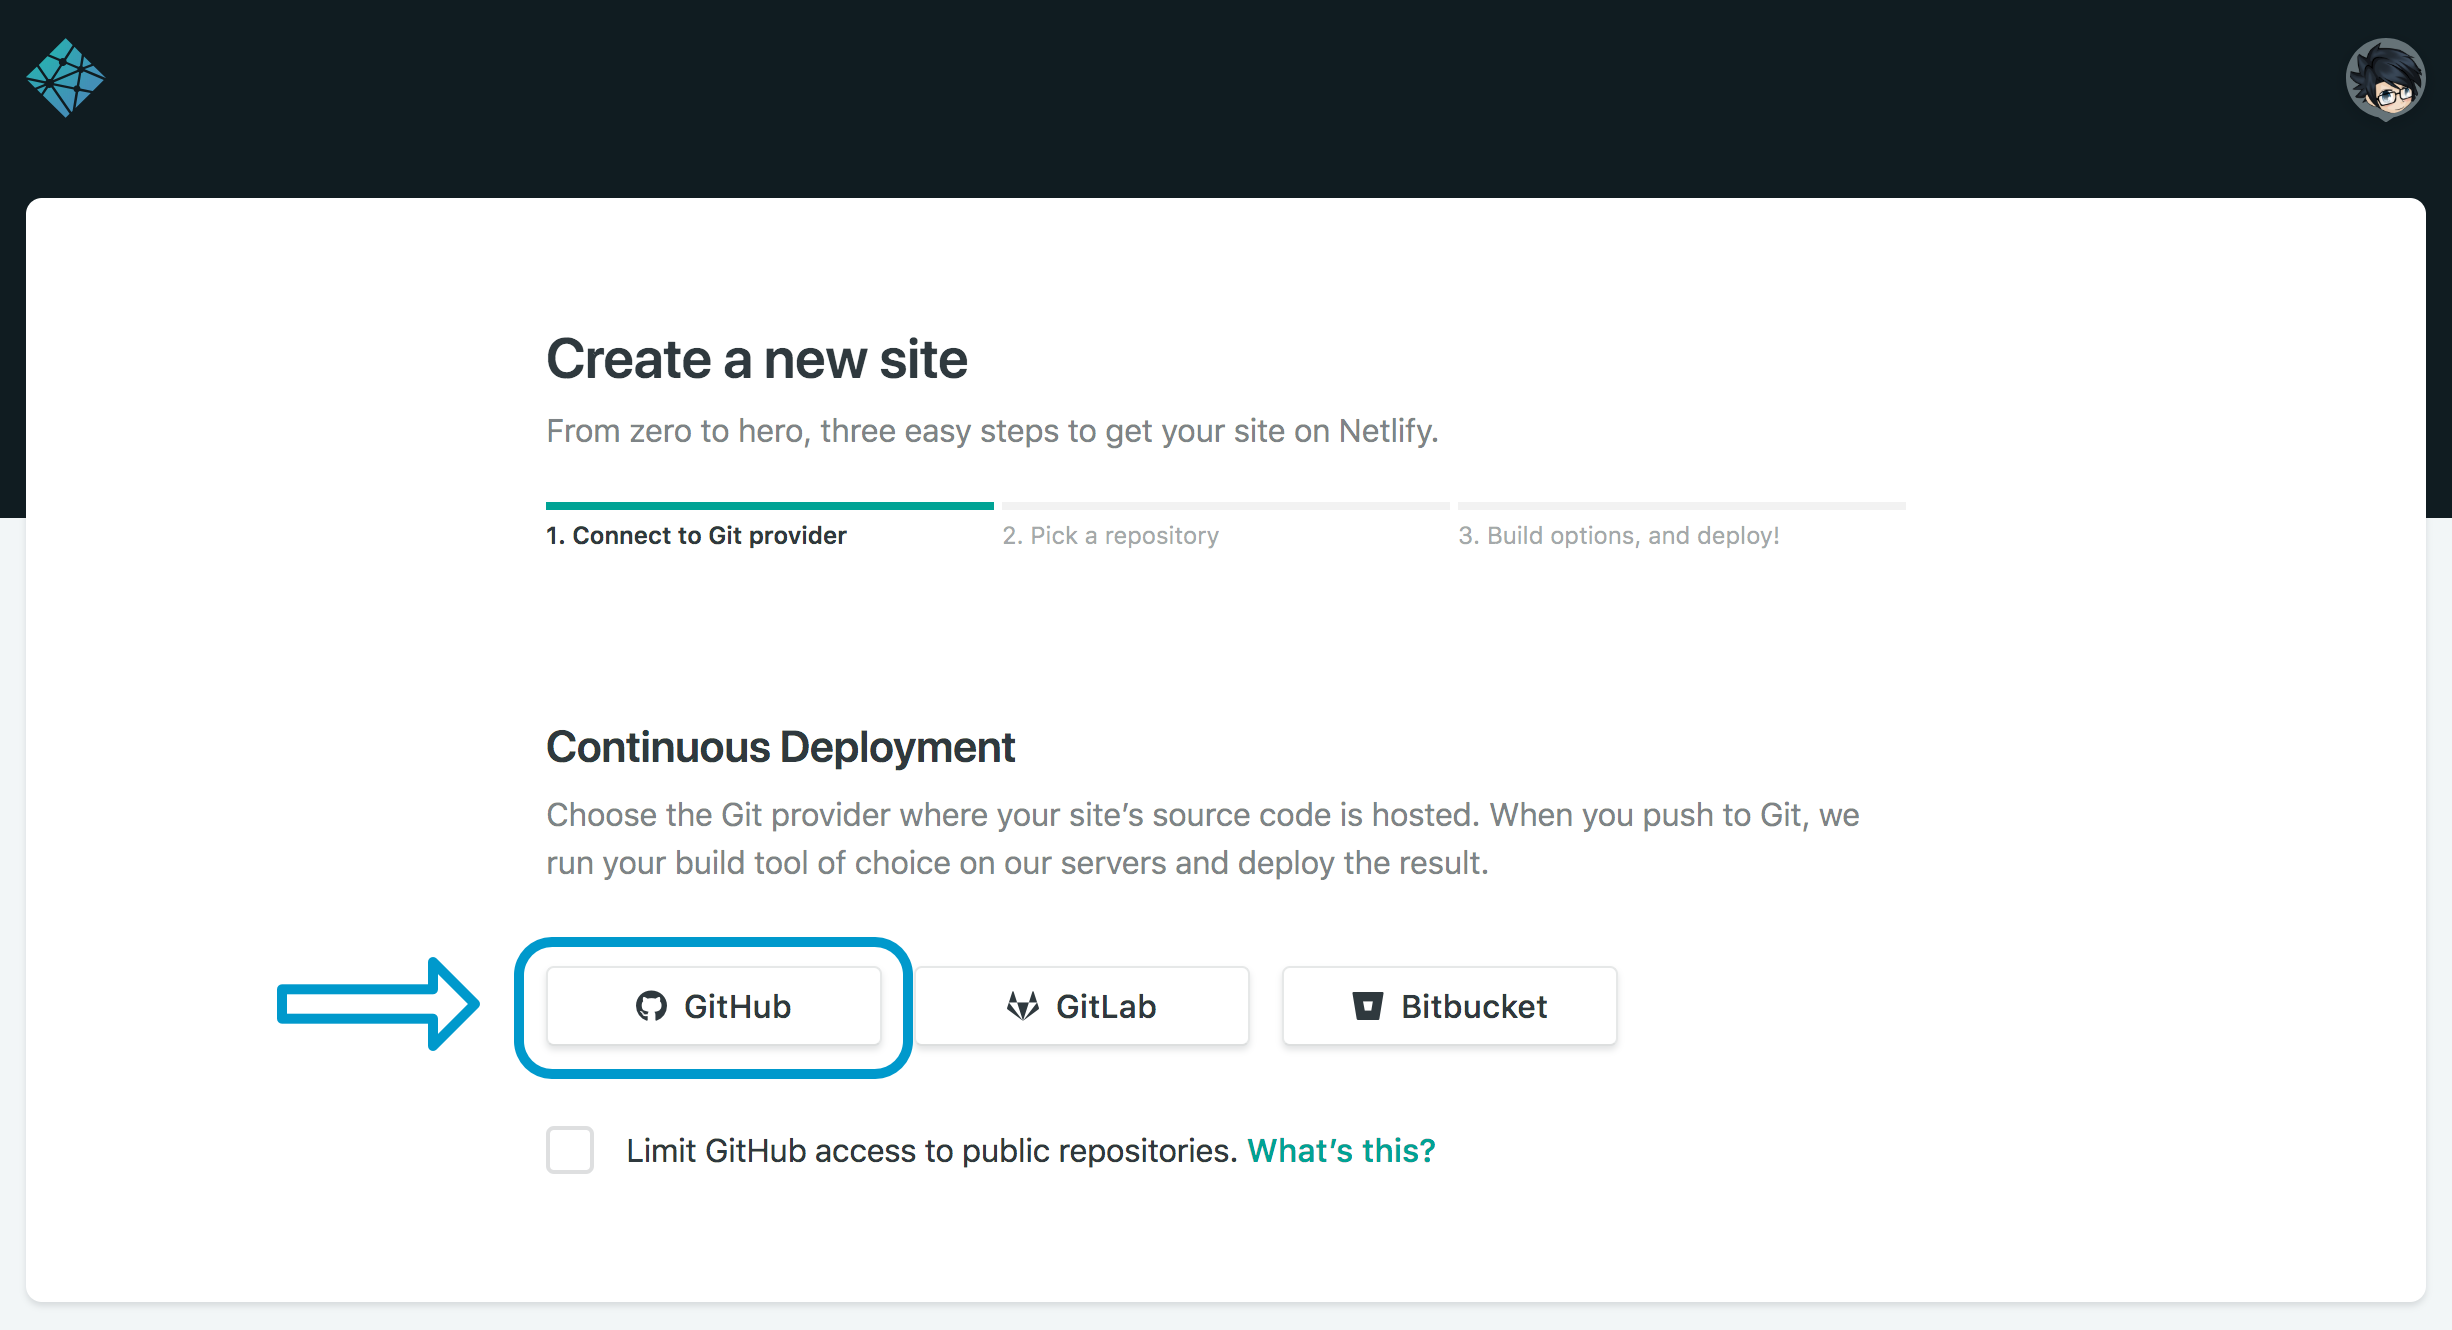
Next we need to choose our Git provider so pick Github.
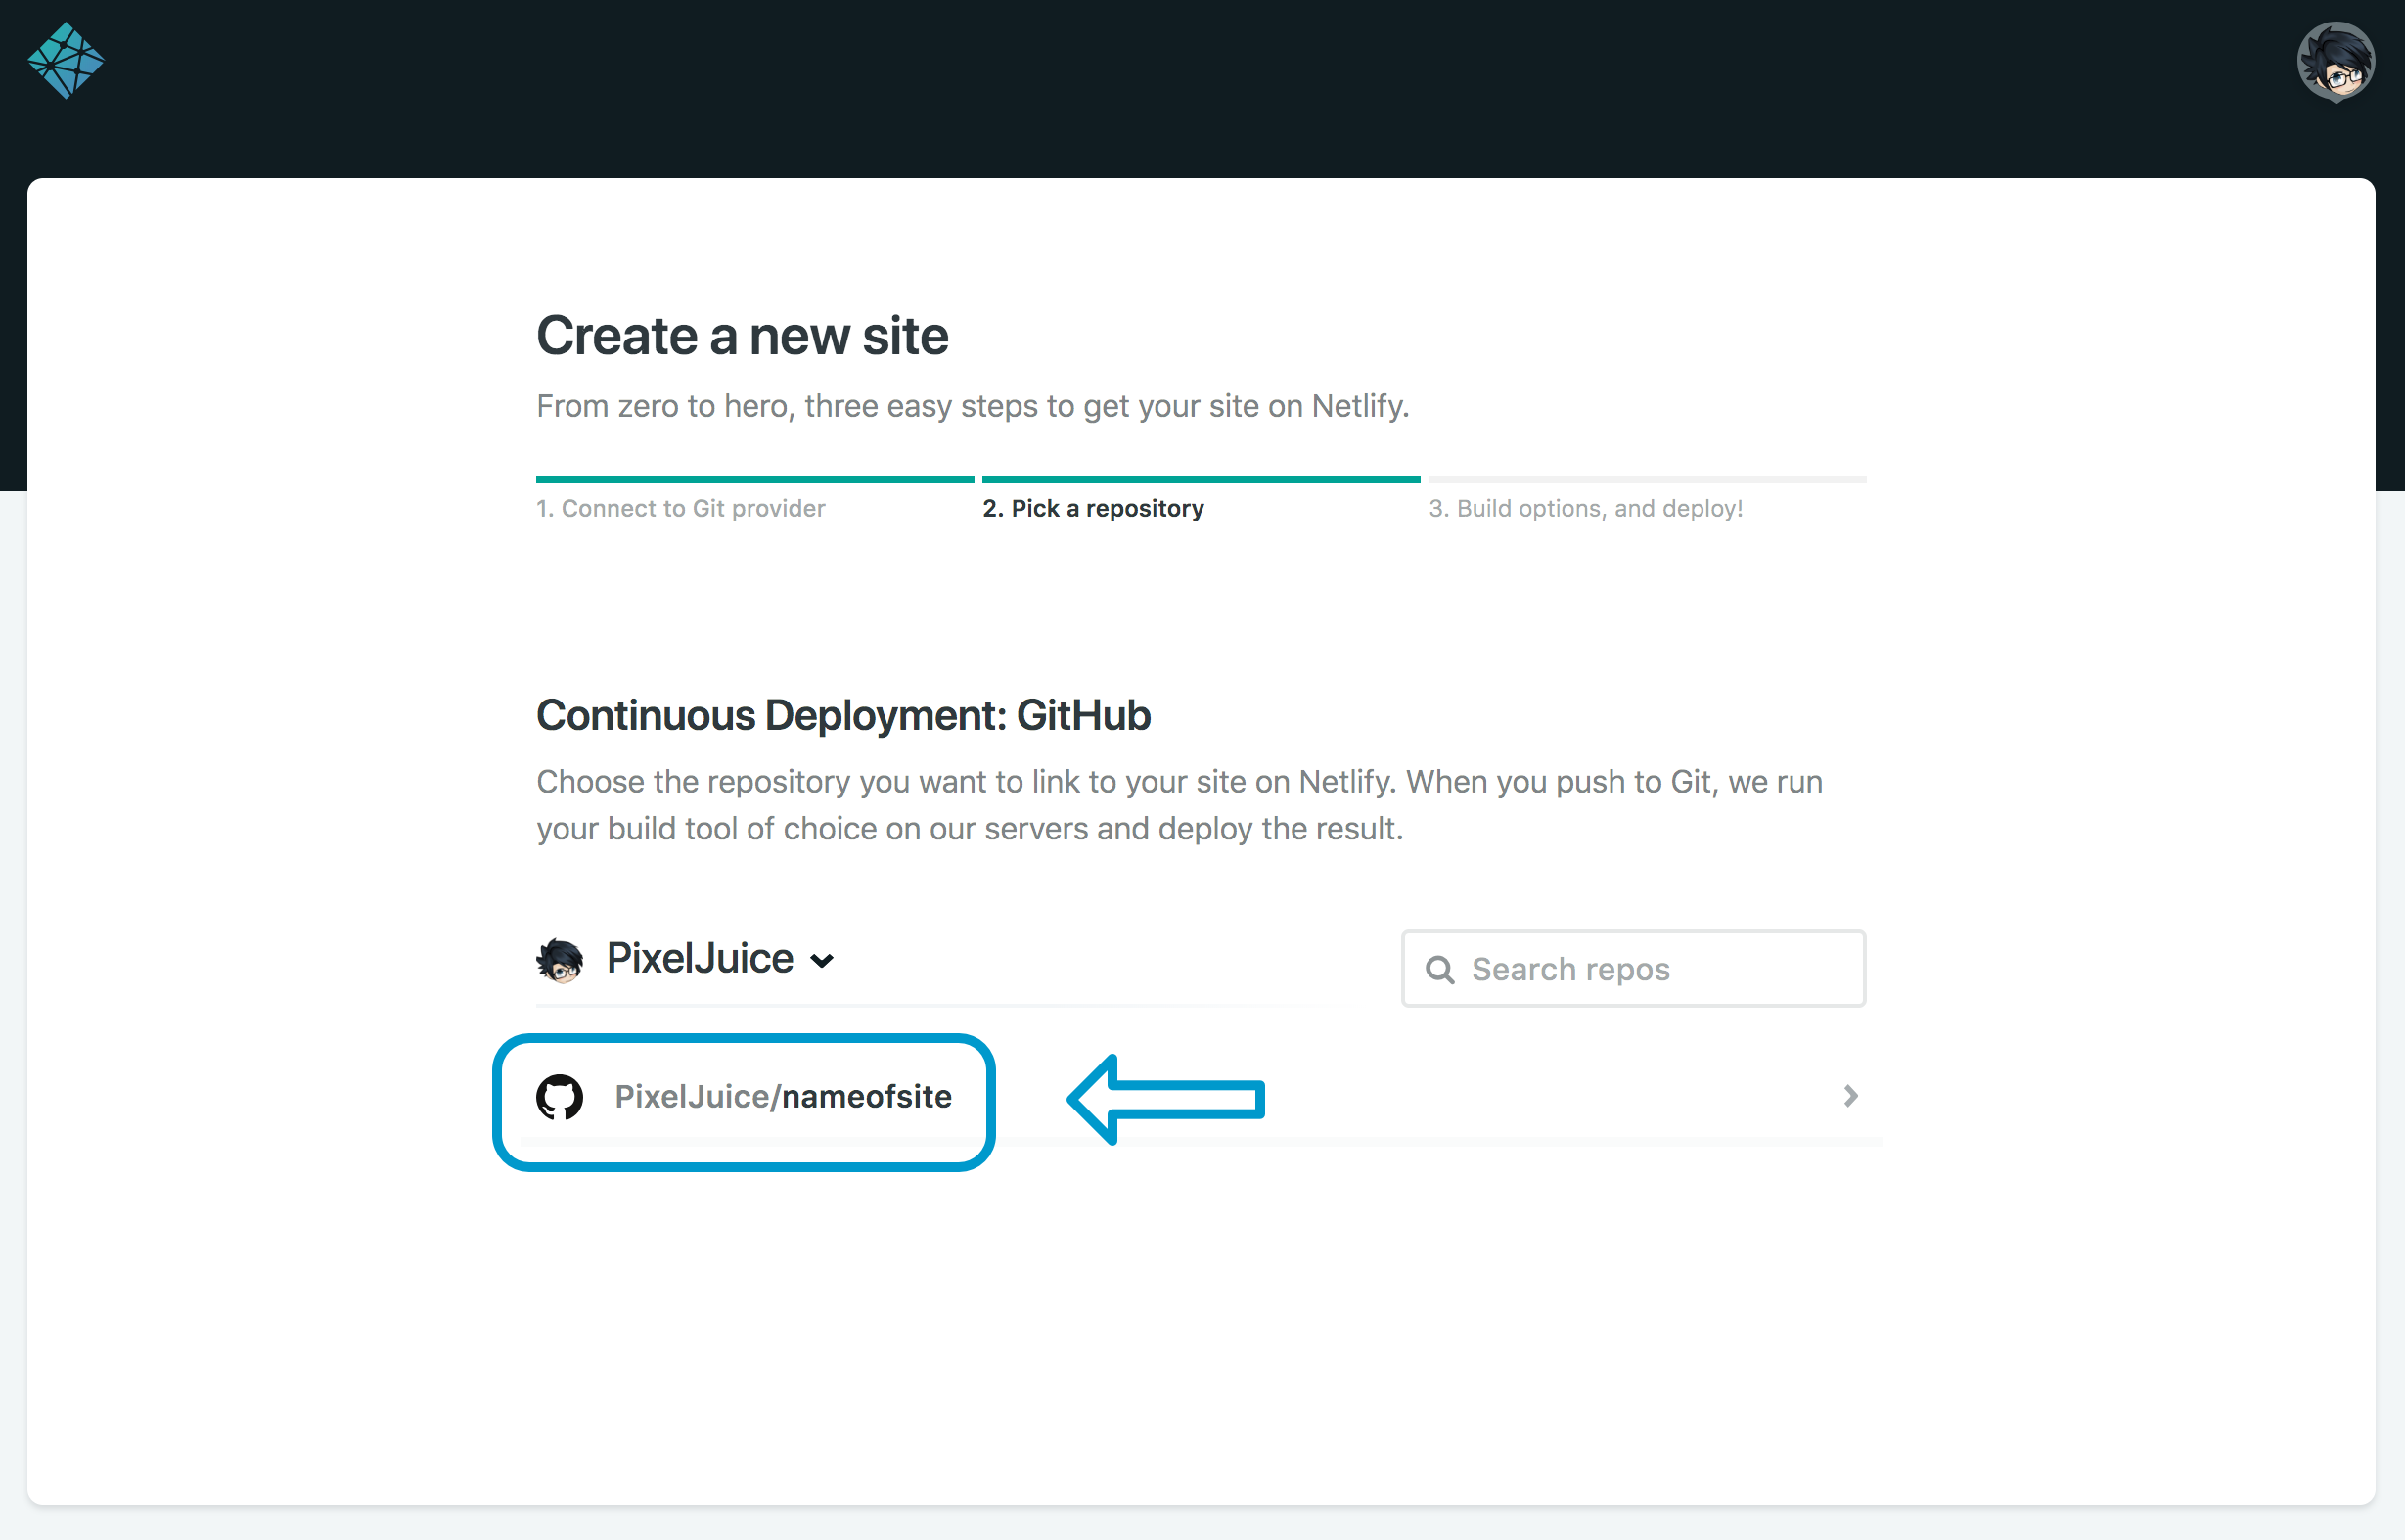
And once you have authenticated, it’s time to choose your repository.
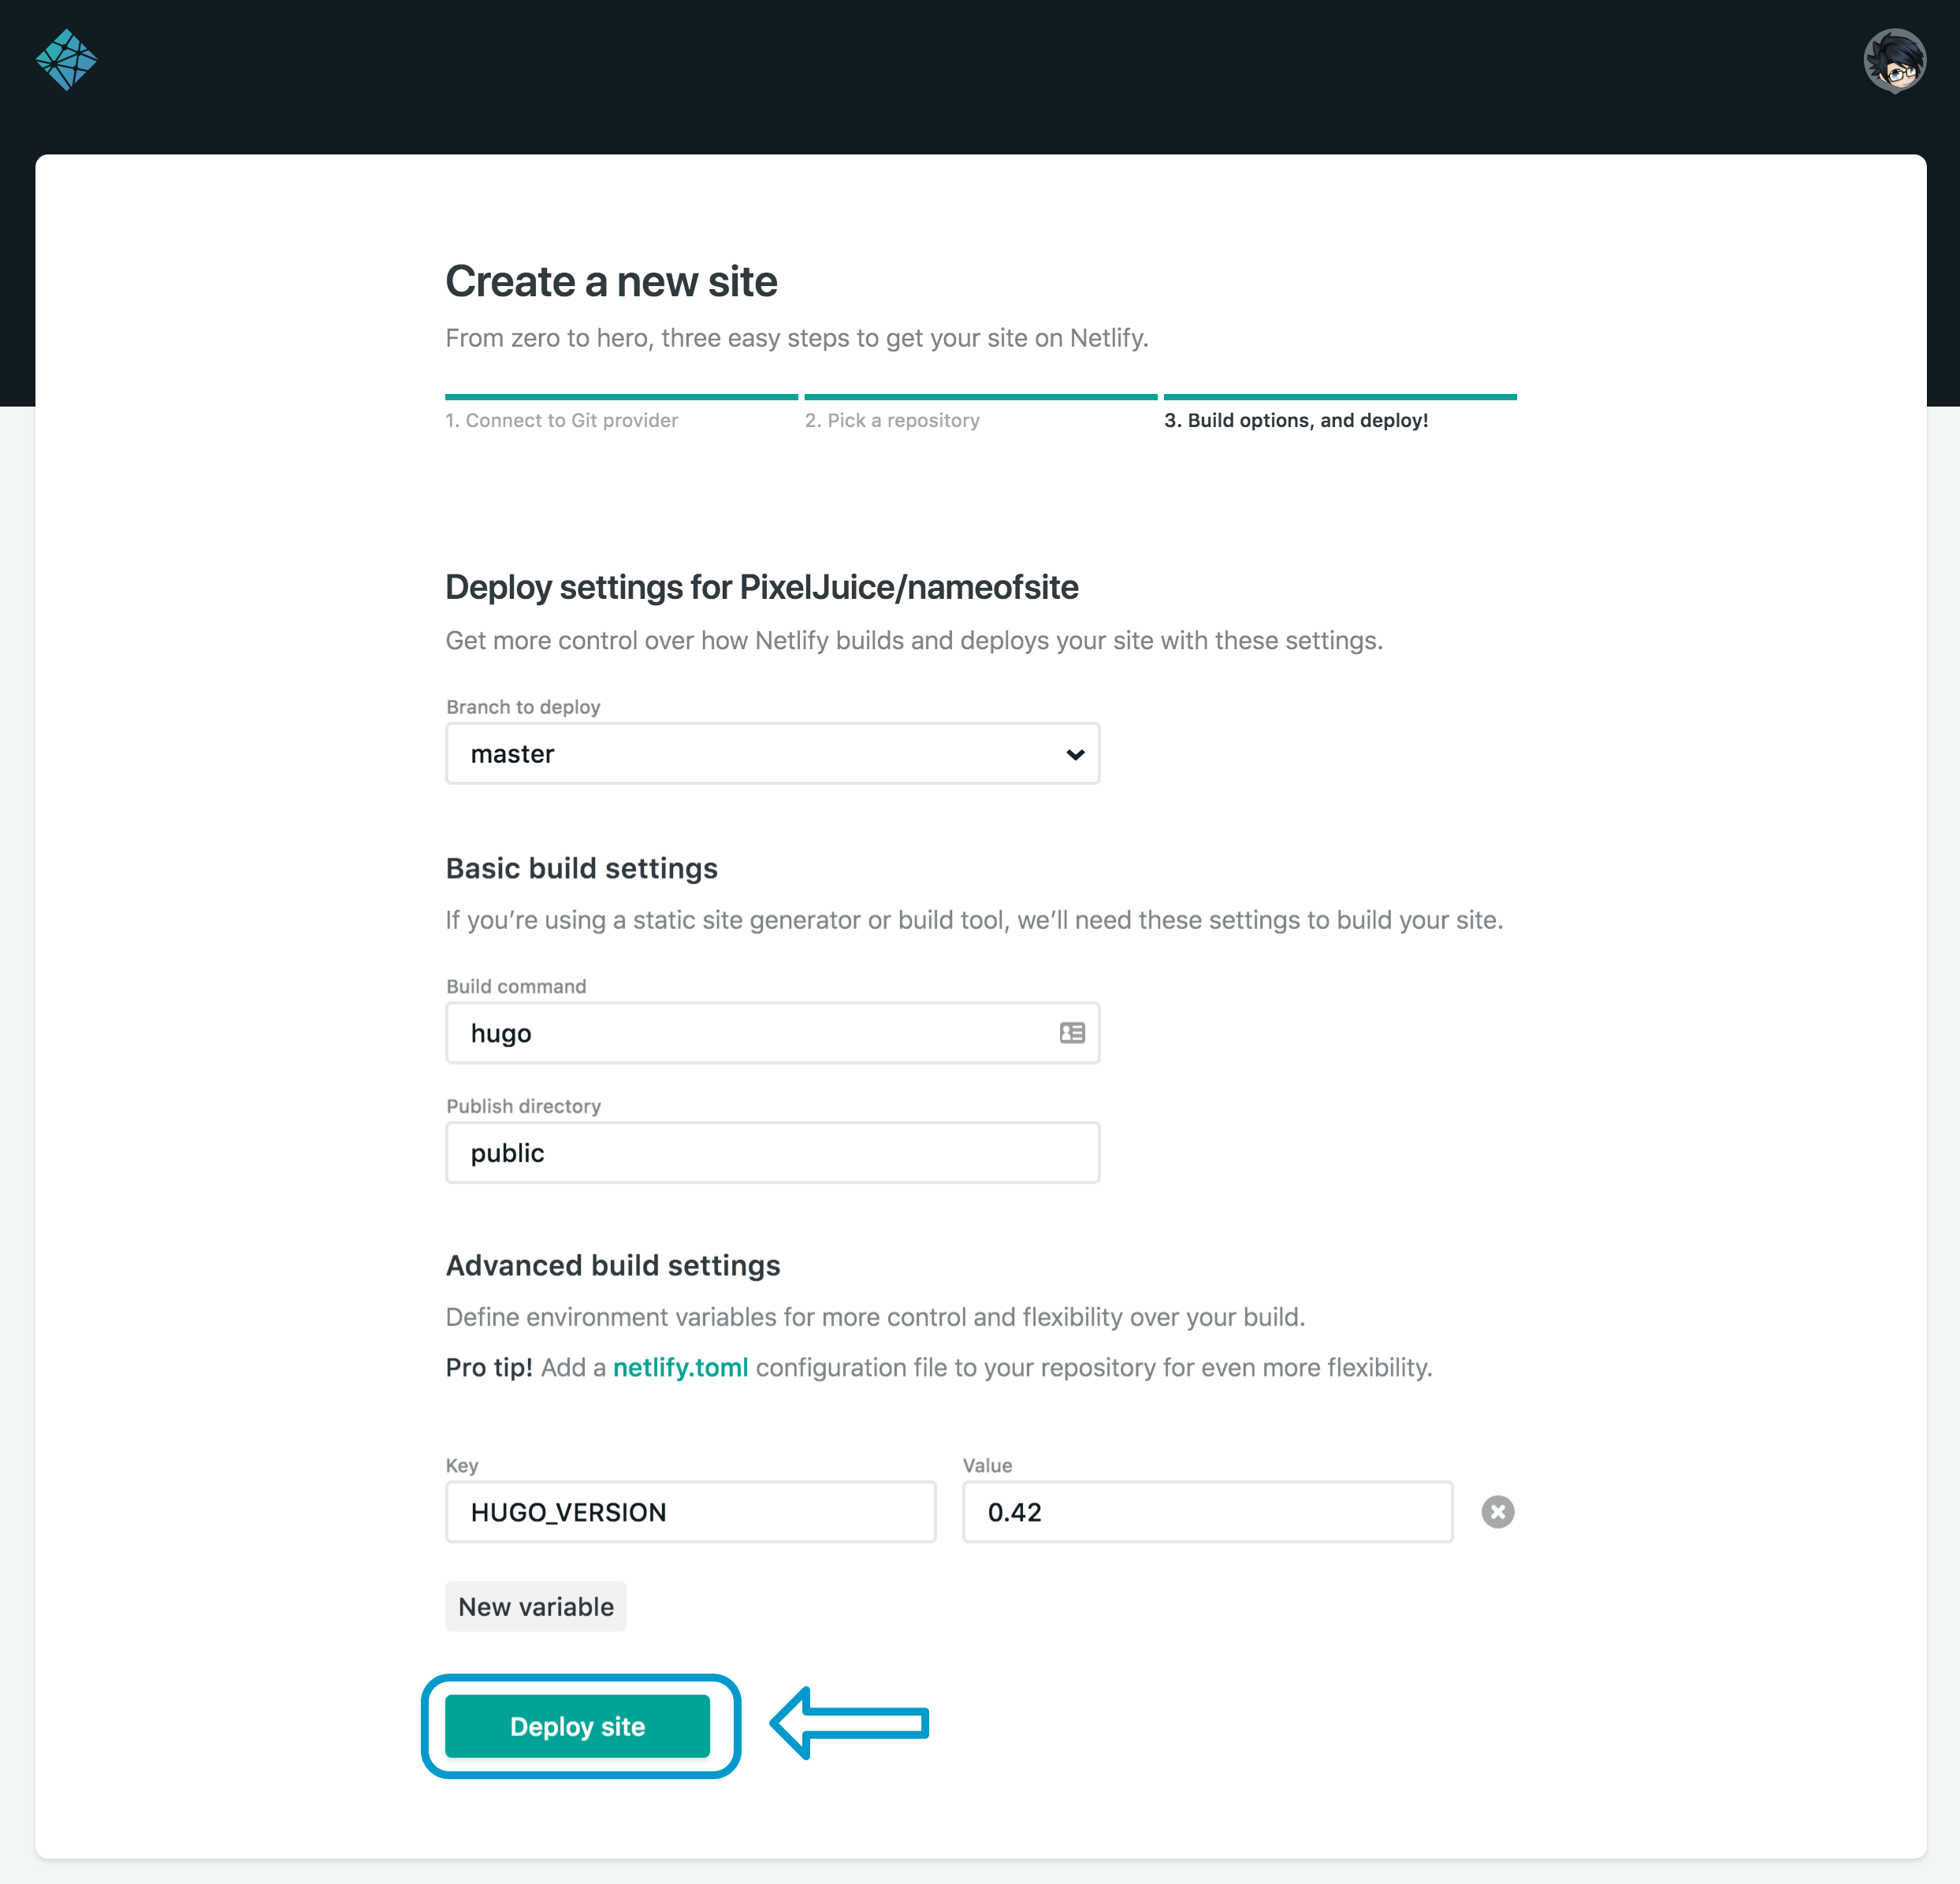
Netlify recognizes Hugo fills in your deploys settings for you. Just make sure they look good, then click “Deploy site”.
Netlify gives you a random domain that might not be to your liking. But we can change that under domain management.
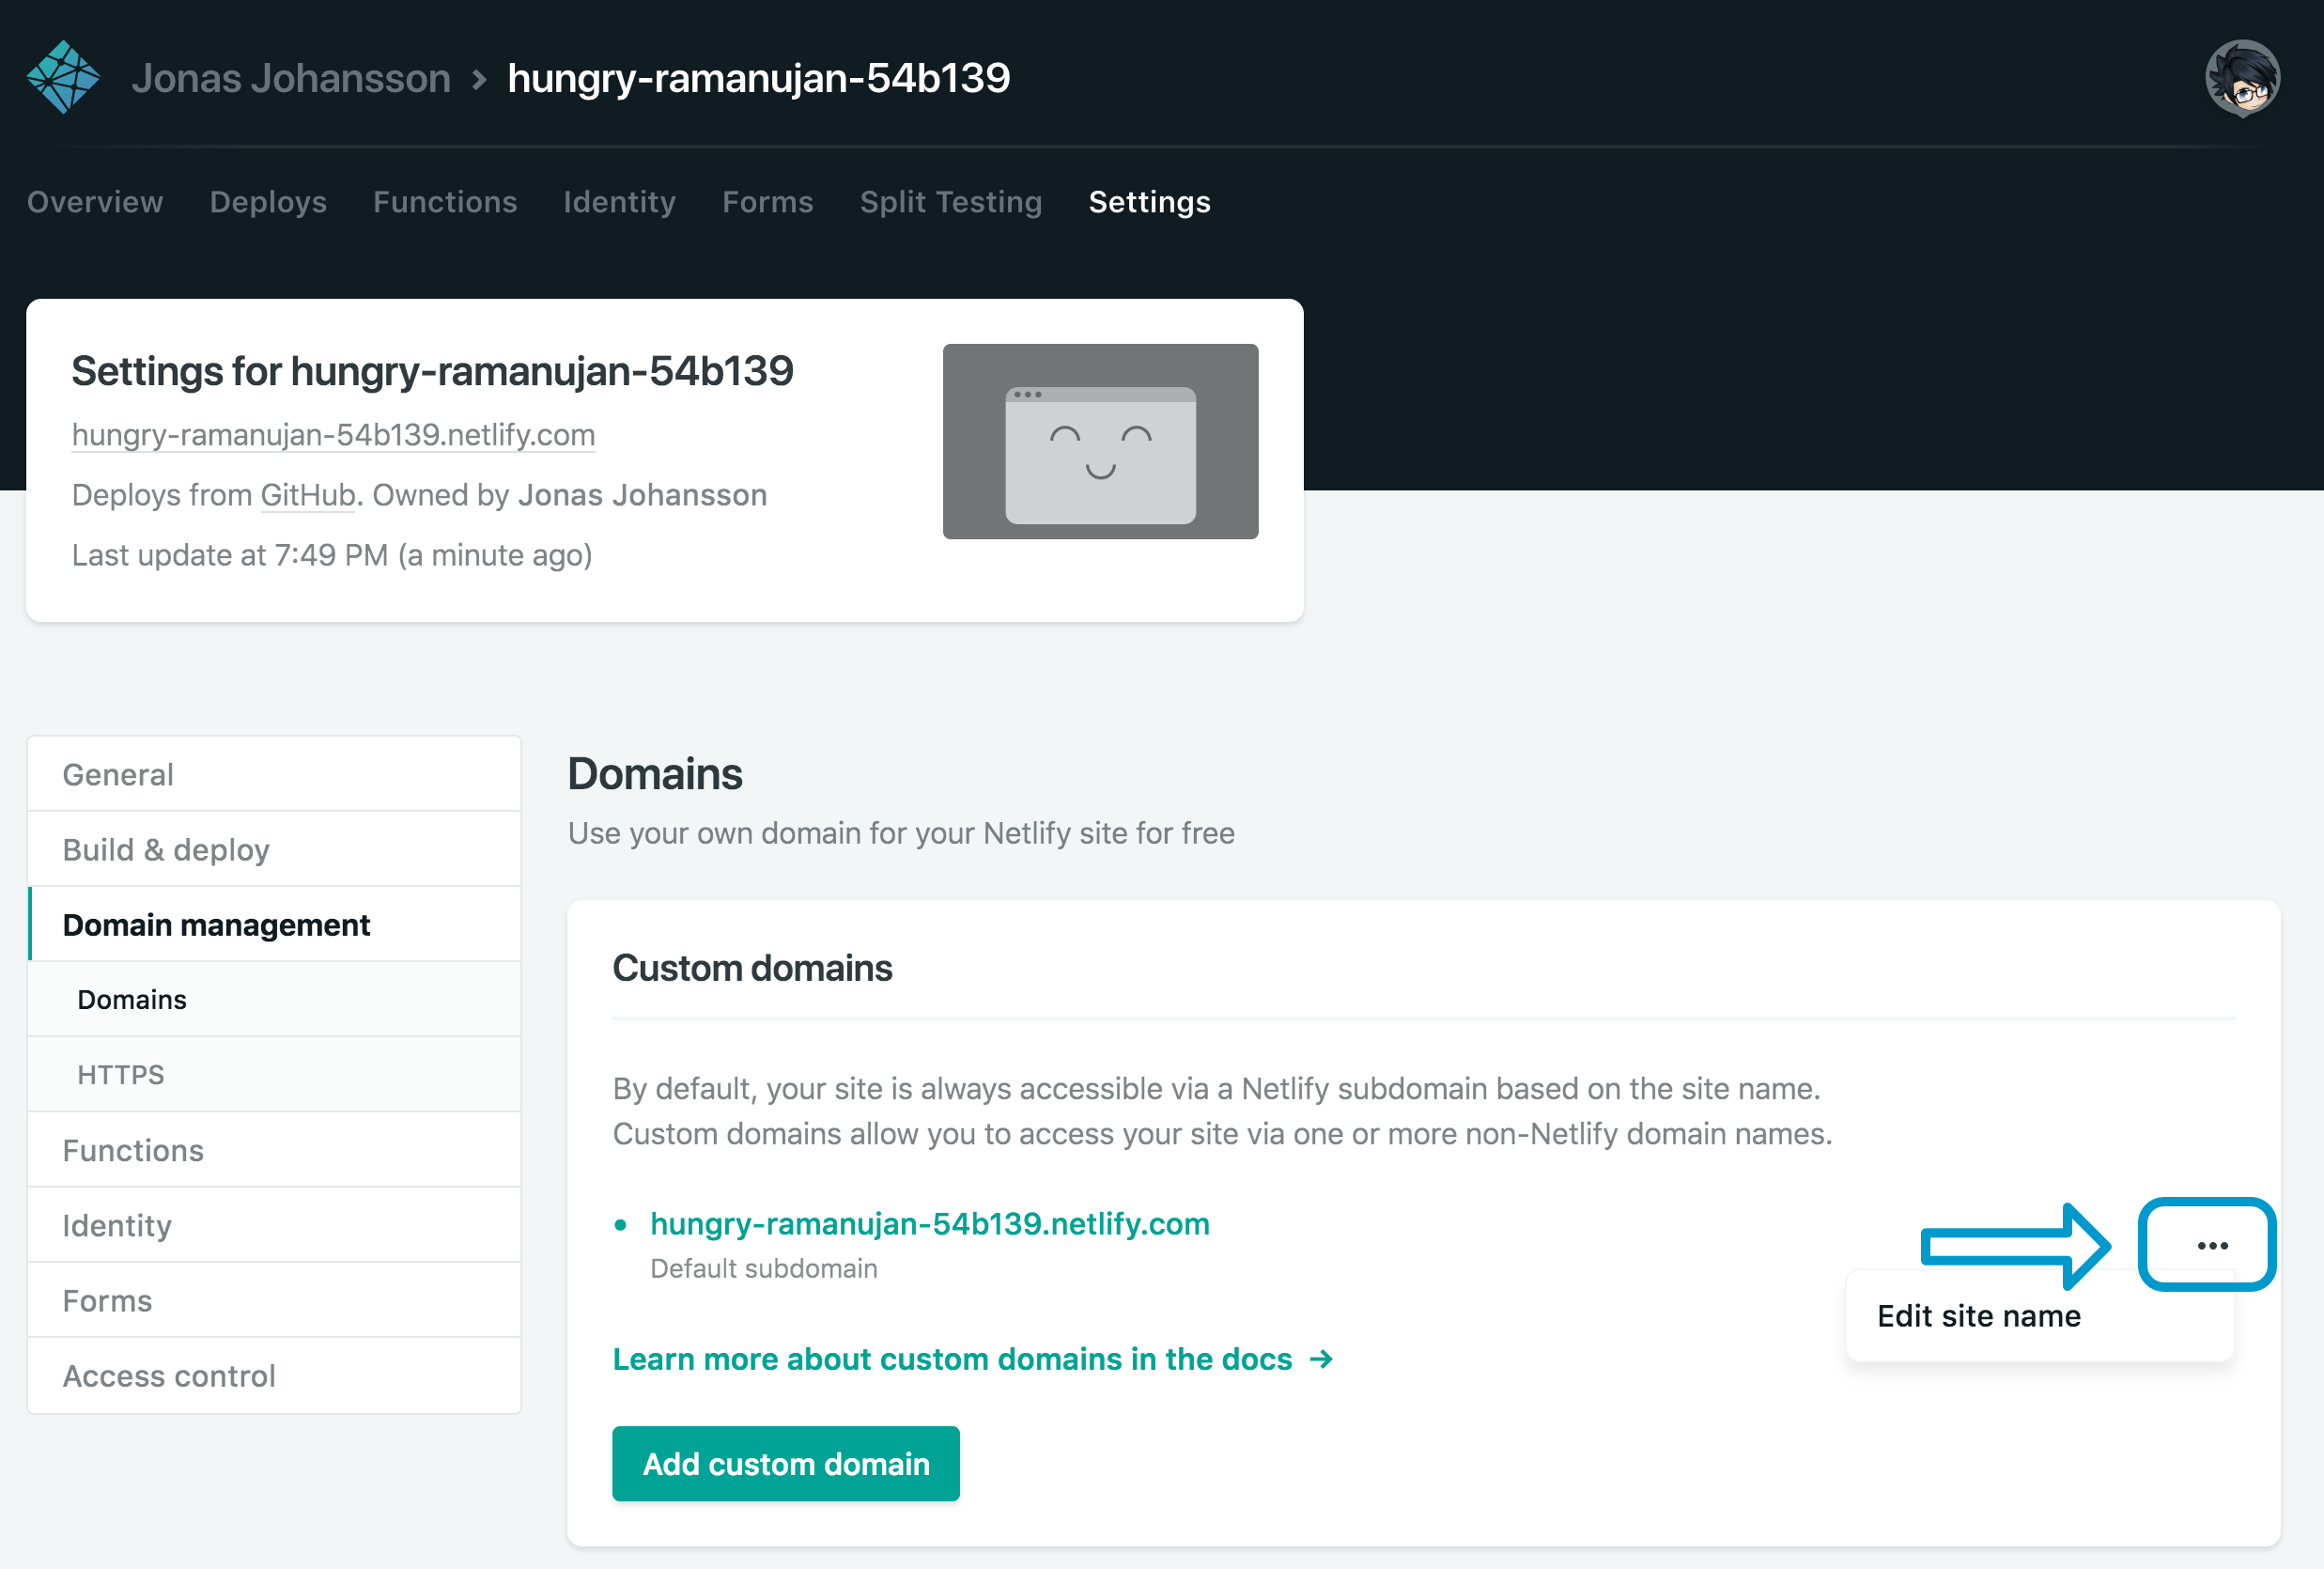
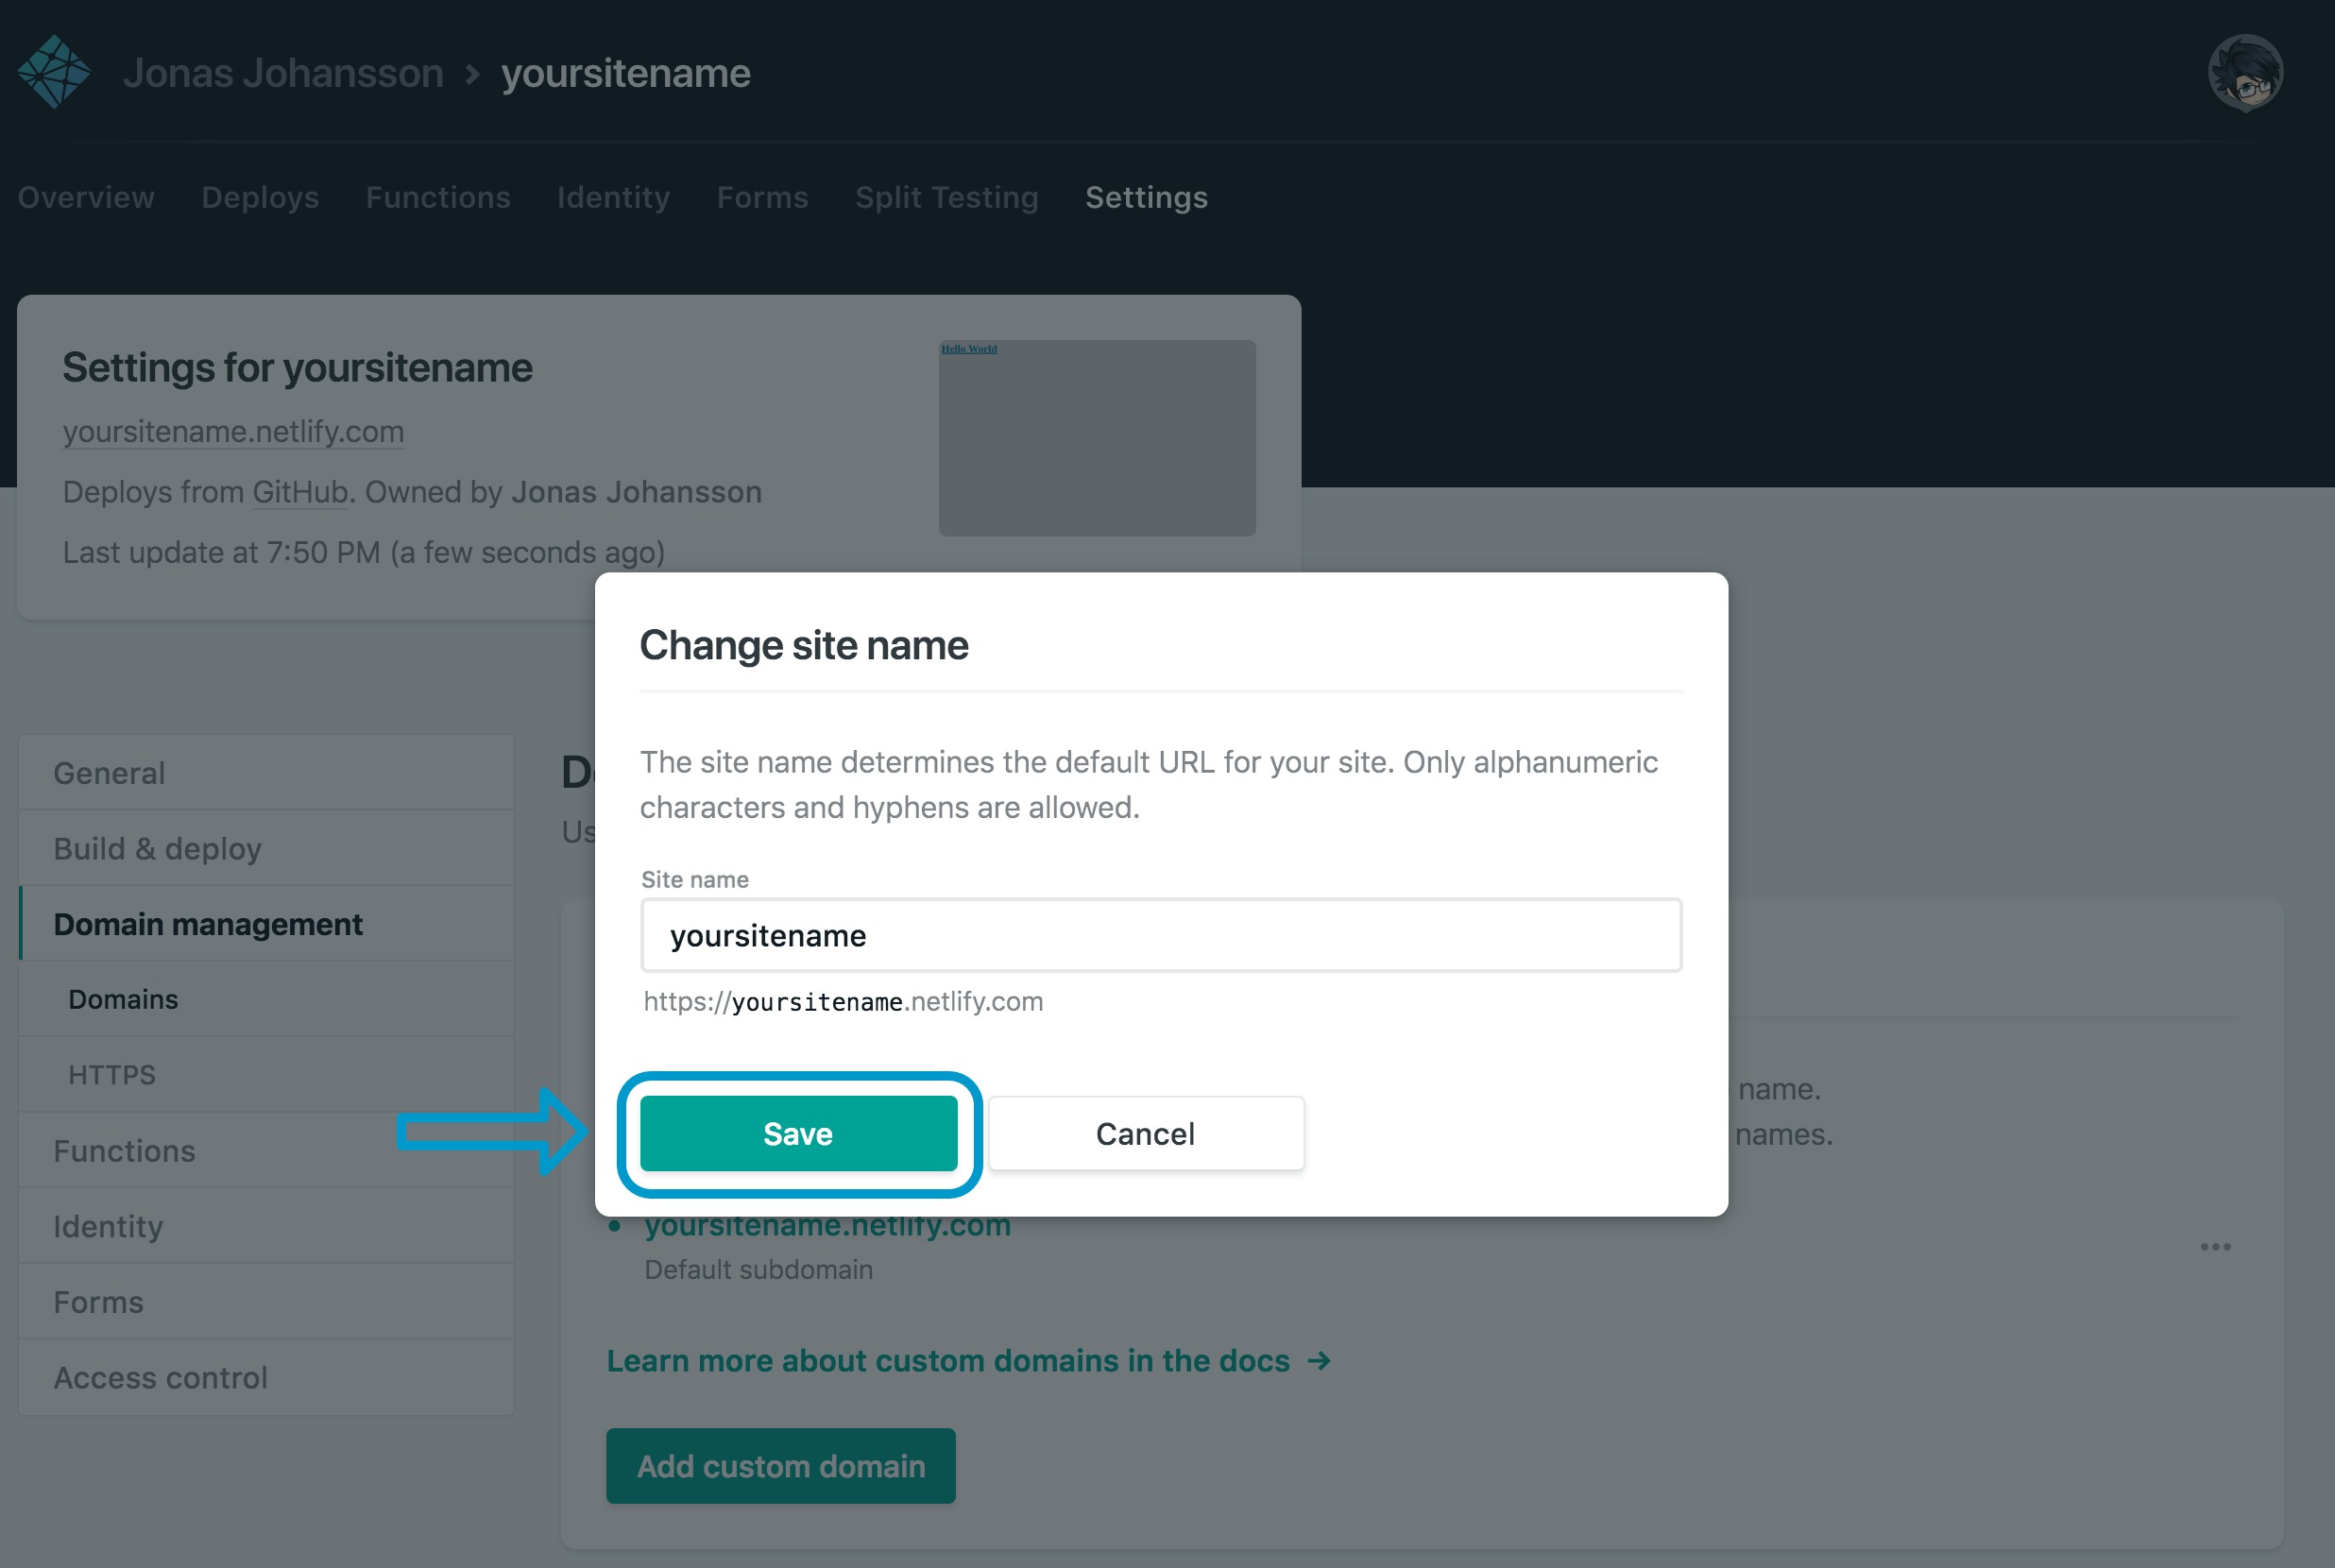
Input your desired name, and if it’s not already taken, you can hit “save.”
And that is all you need to do to have a shiny new site up and running.
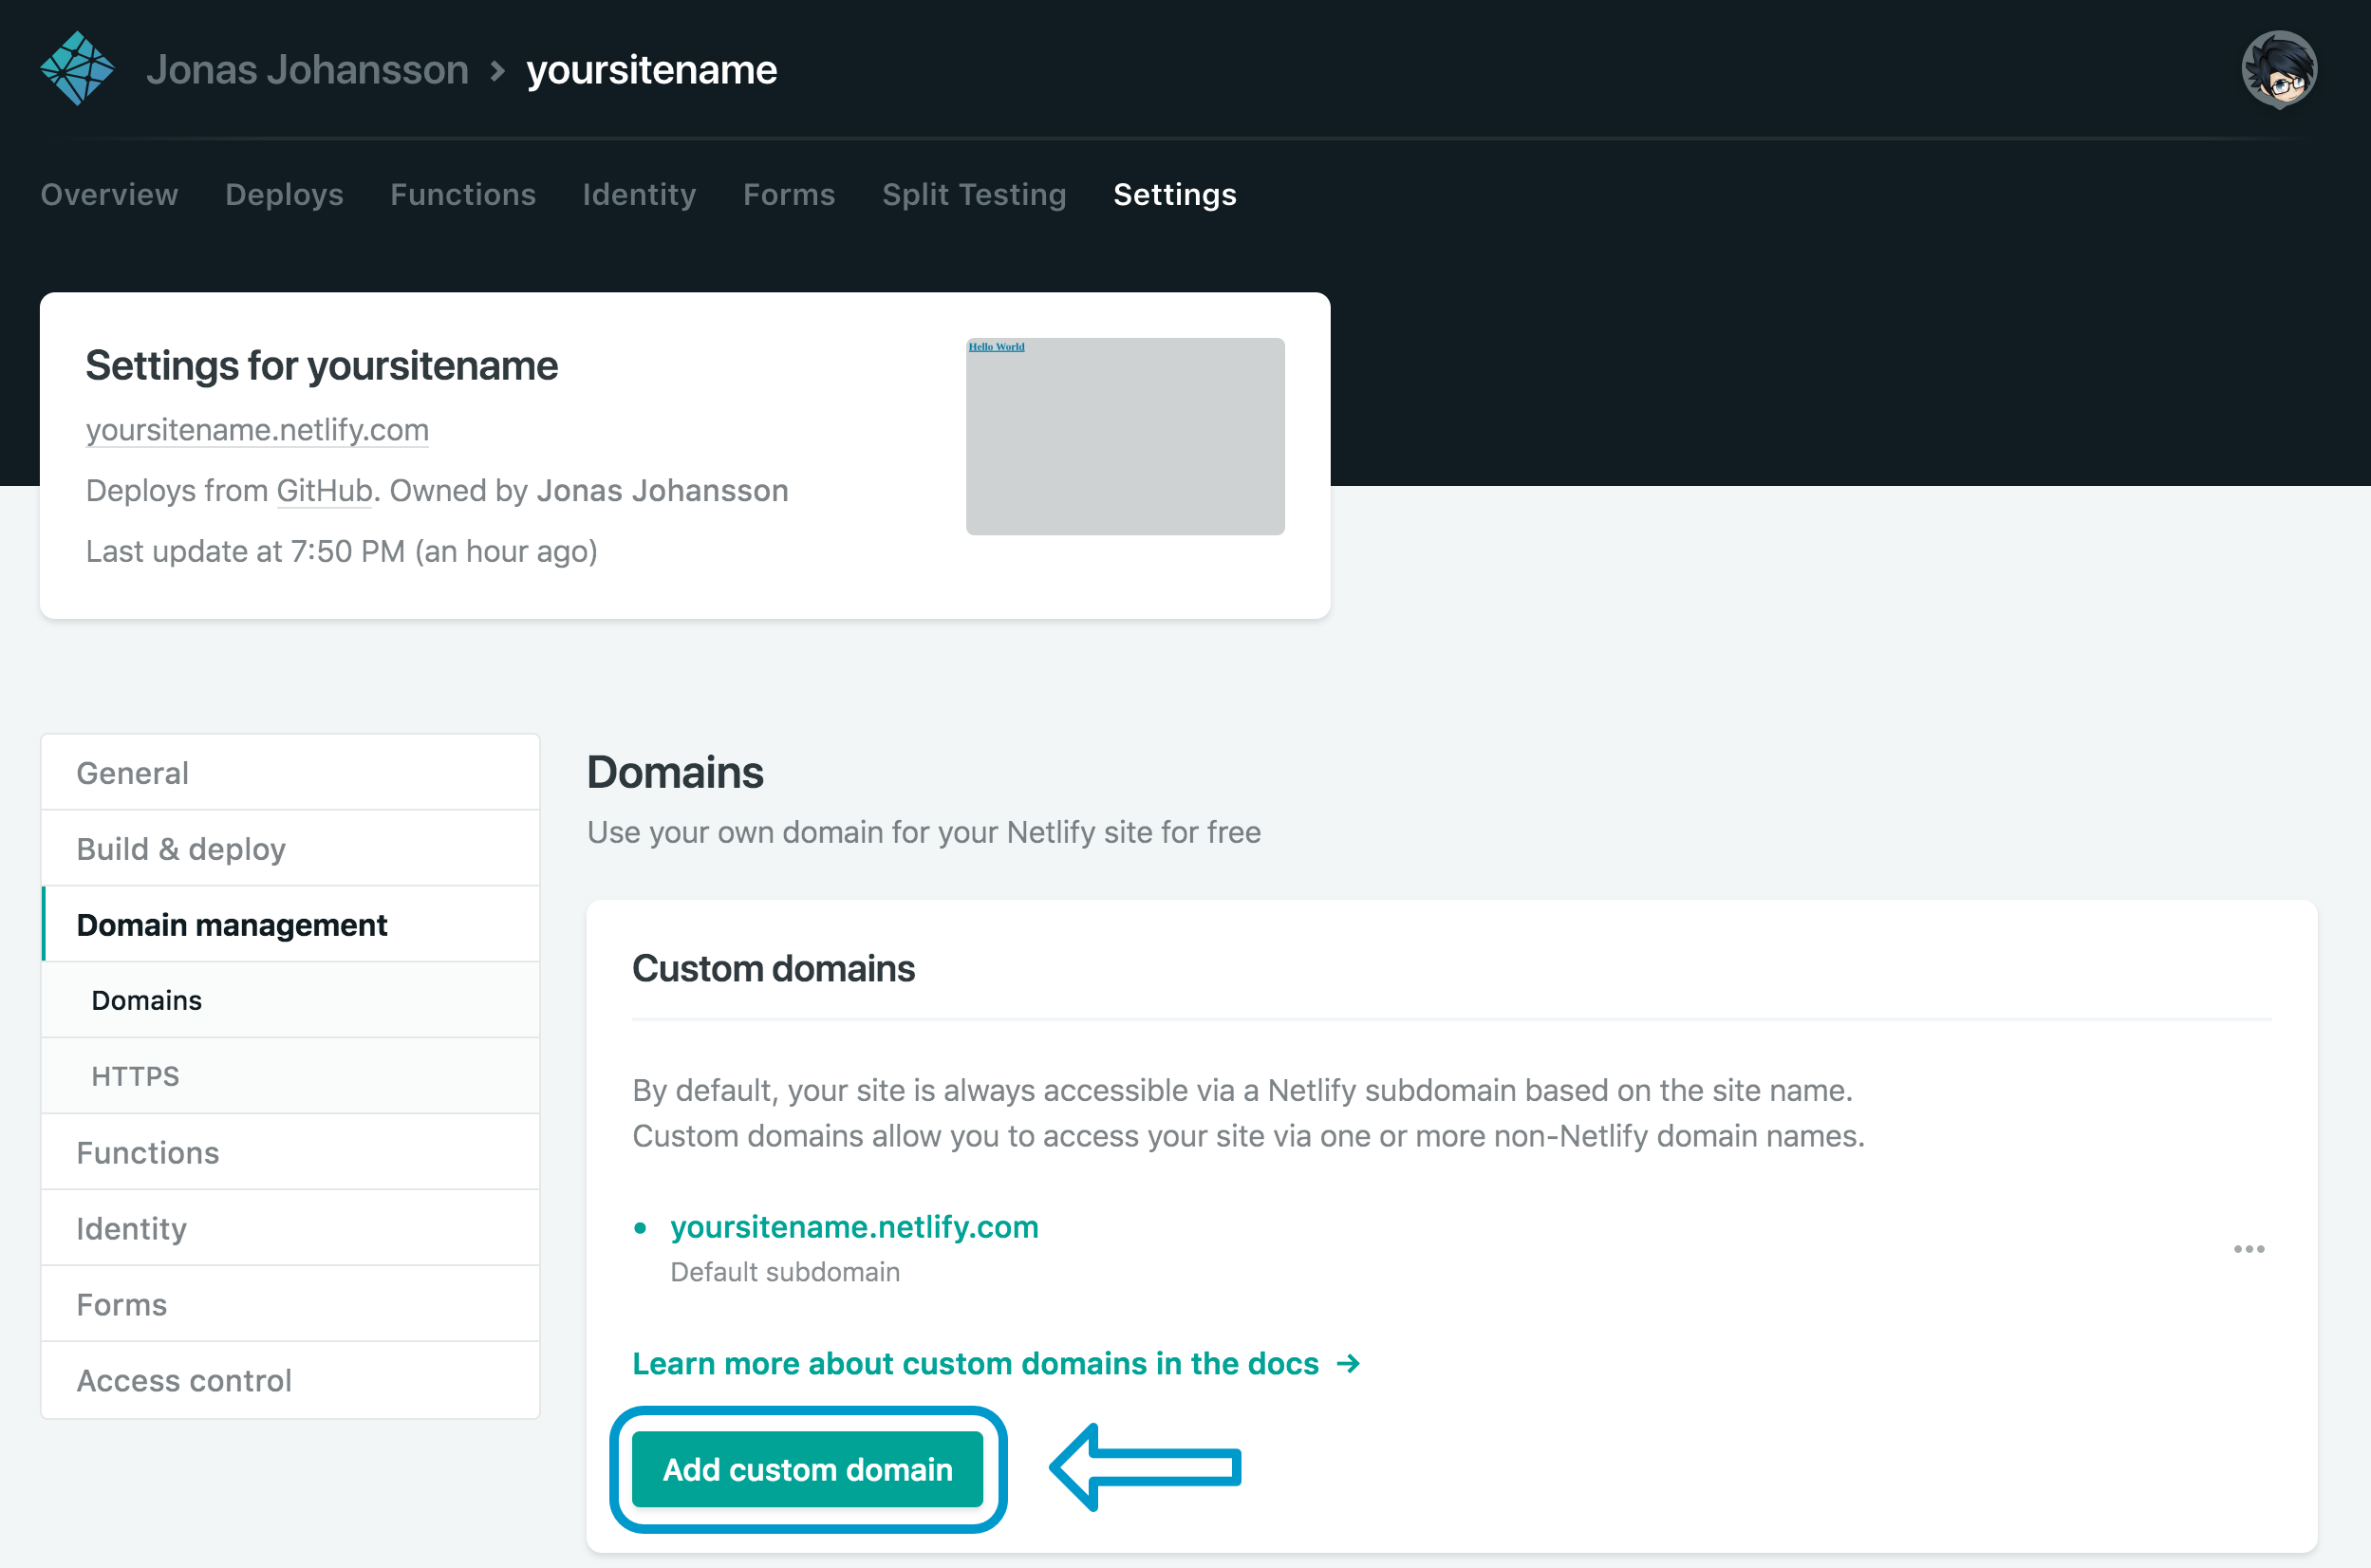
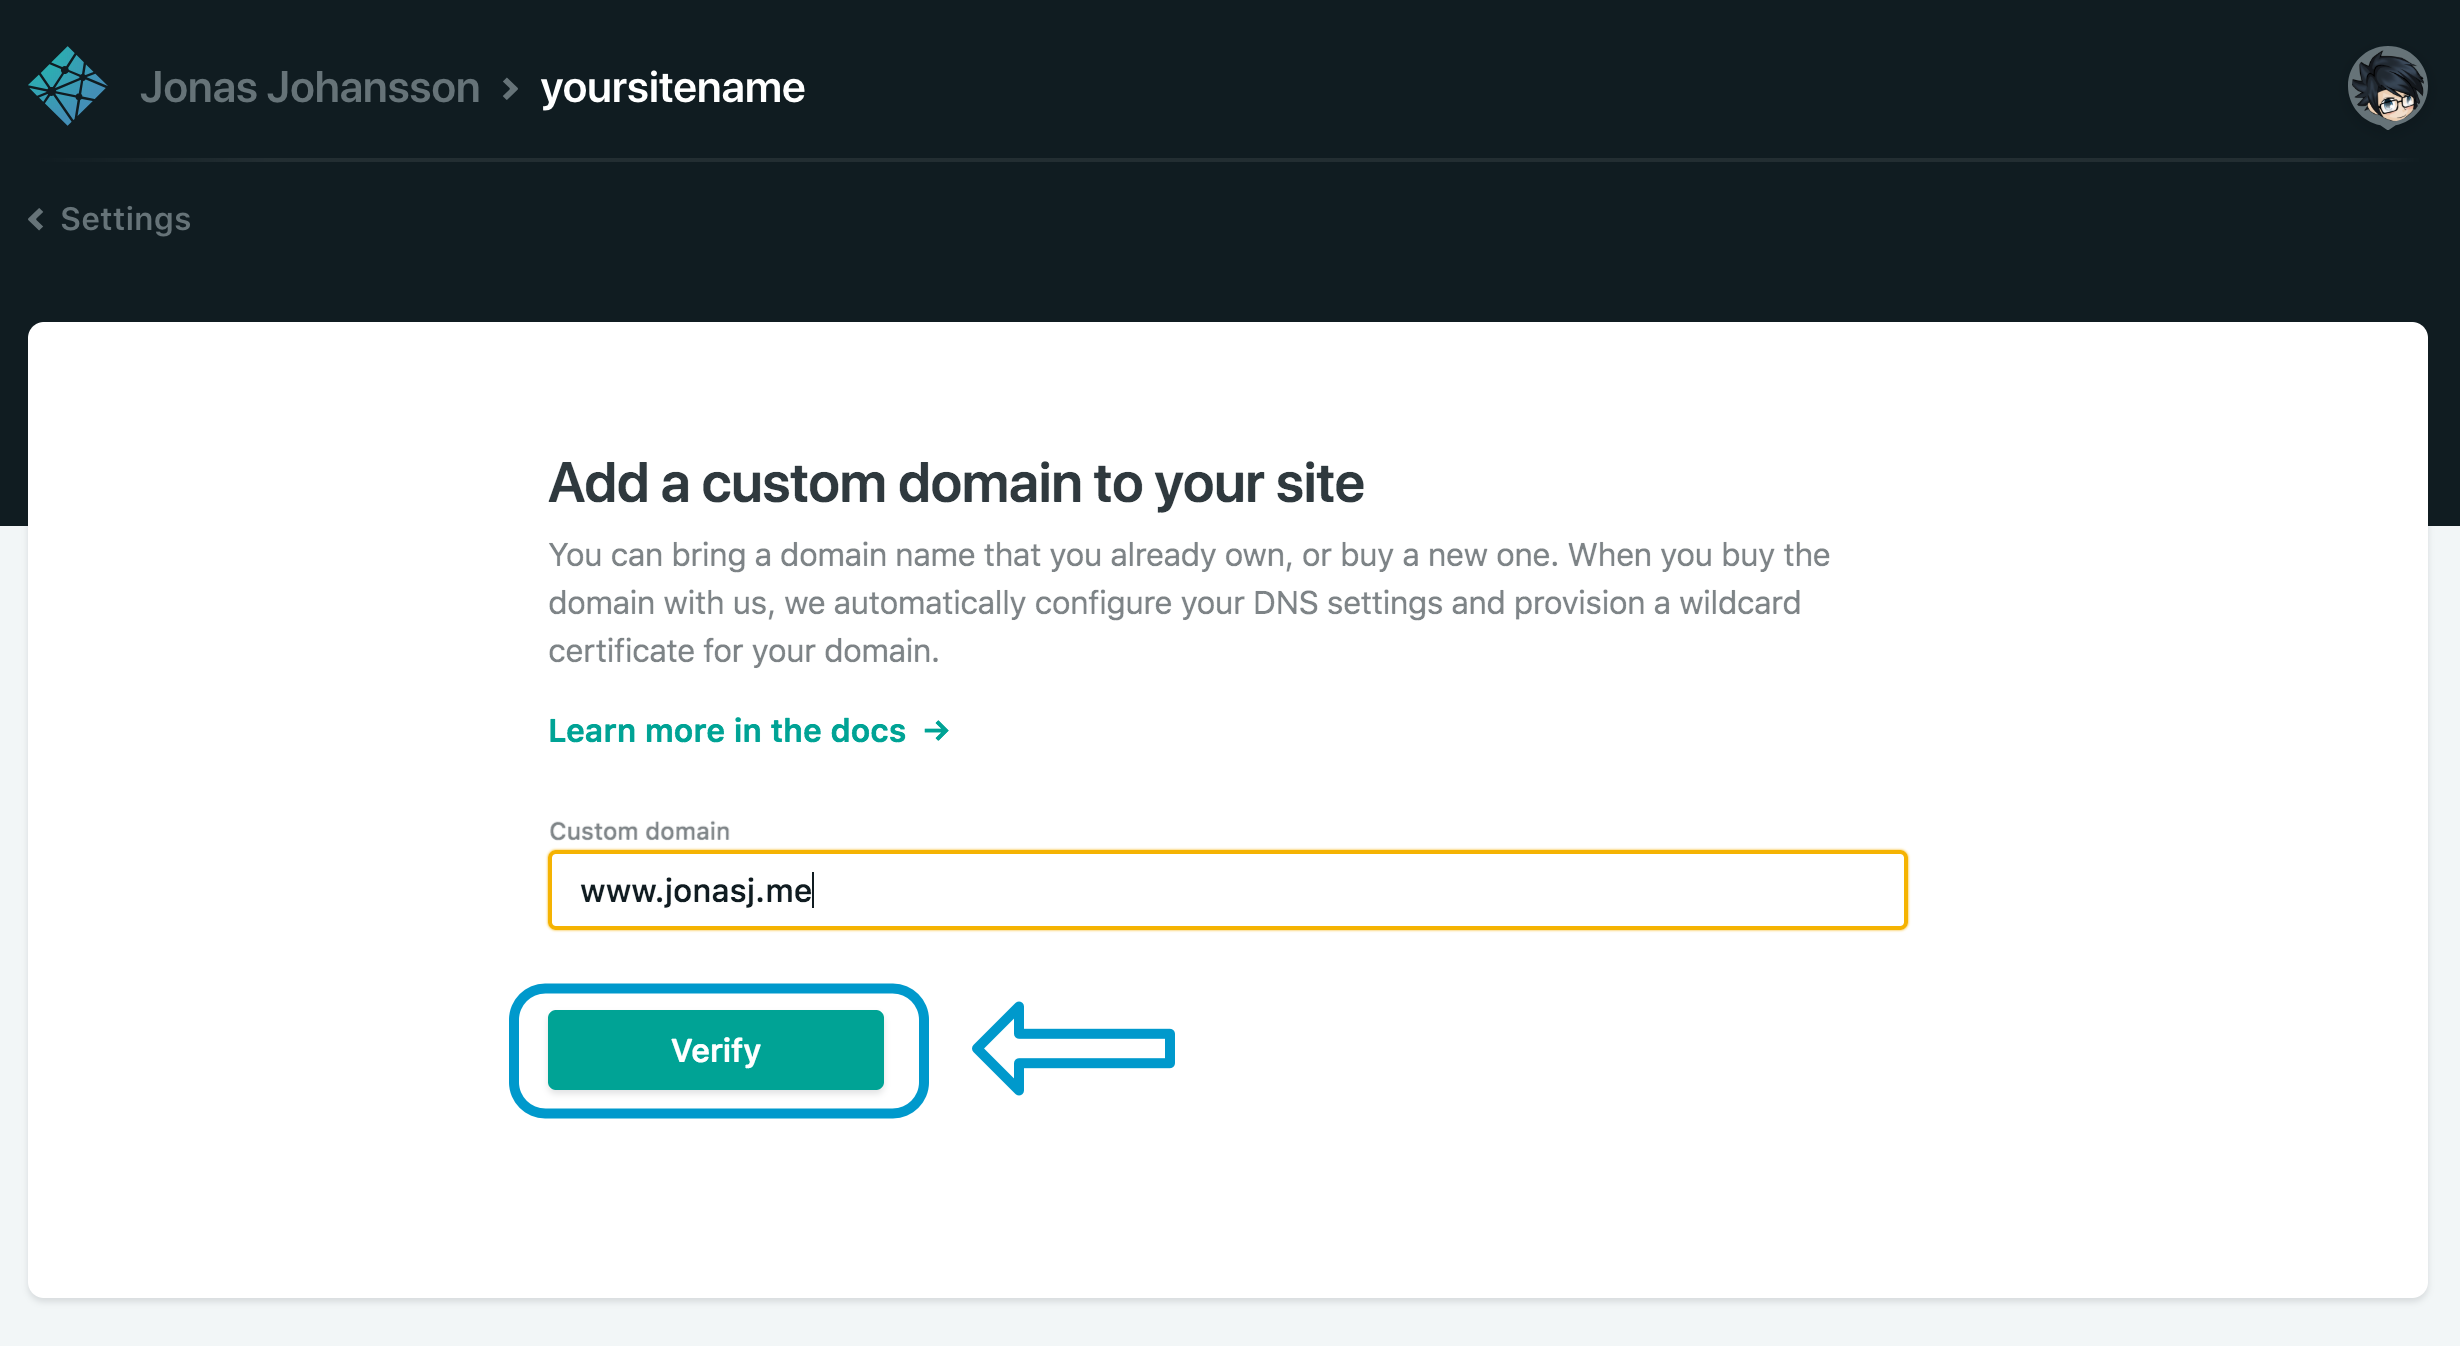
Some of you might want to have your own domain, and the setup is going to be different depending on the supplier. But to start, press “Add custom domain” in the same place you changed your Netlify subdomain URL.
Enter your domain name and verify it.
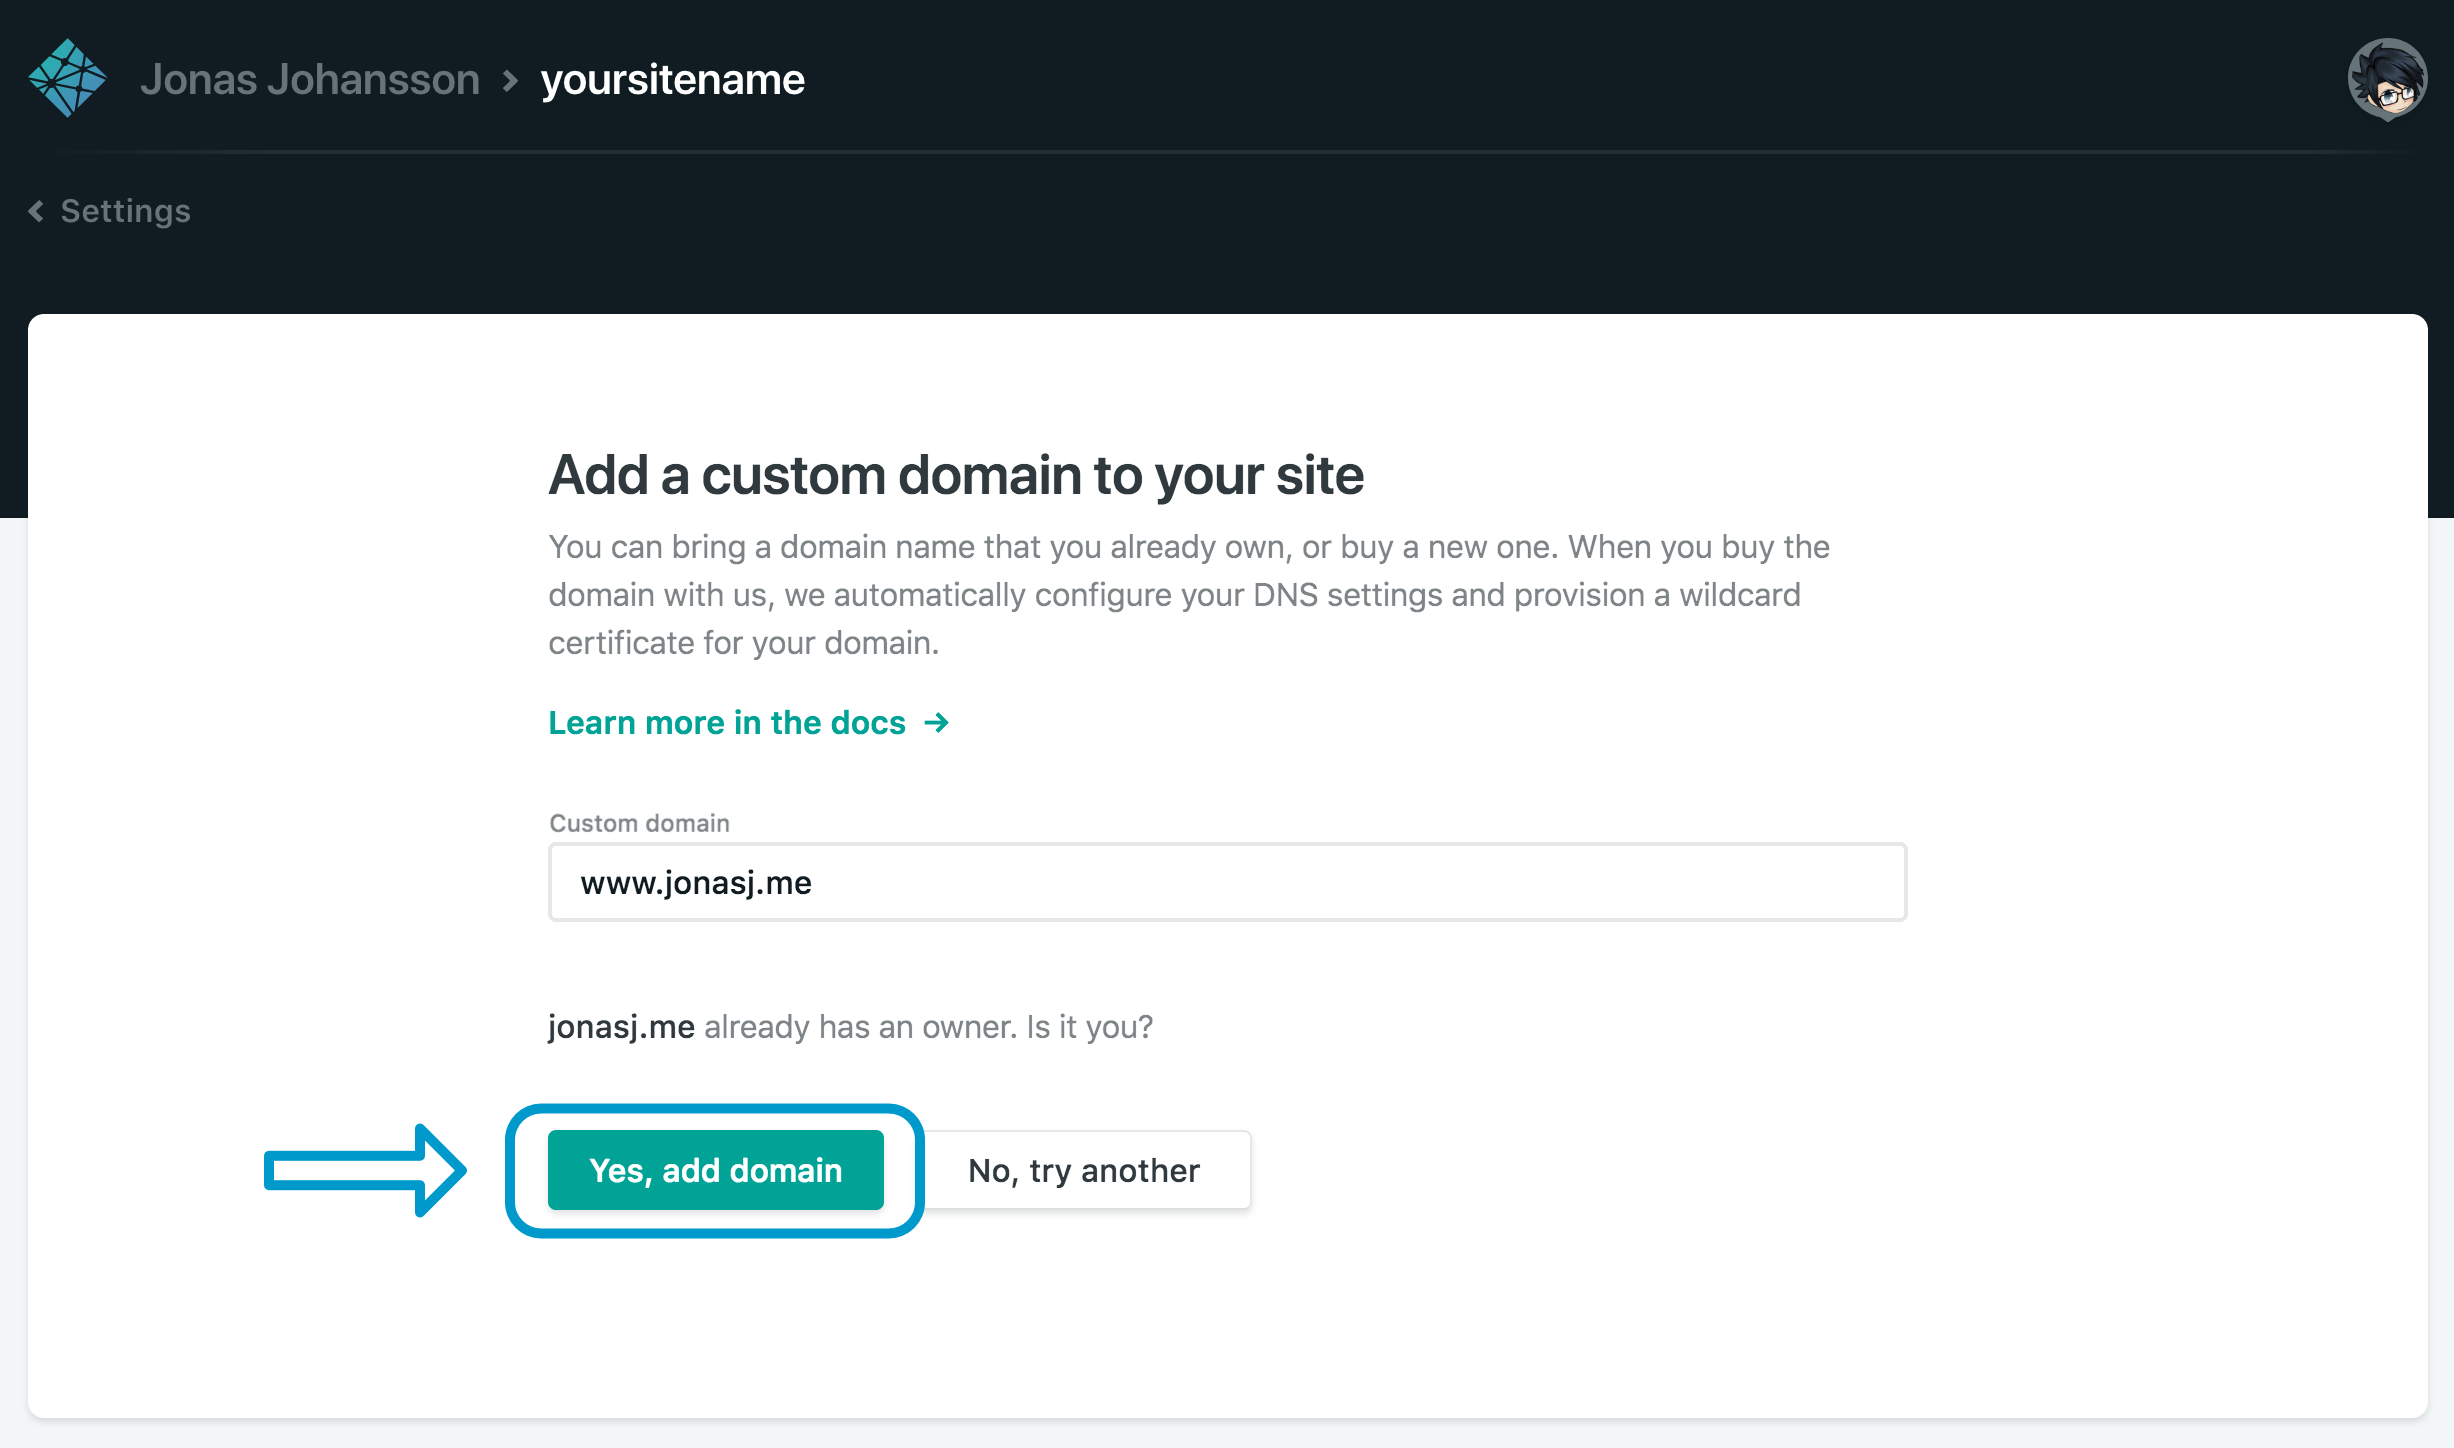
If you bought it from a third party supplier, you will have to verify it again.
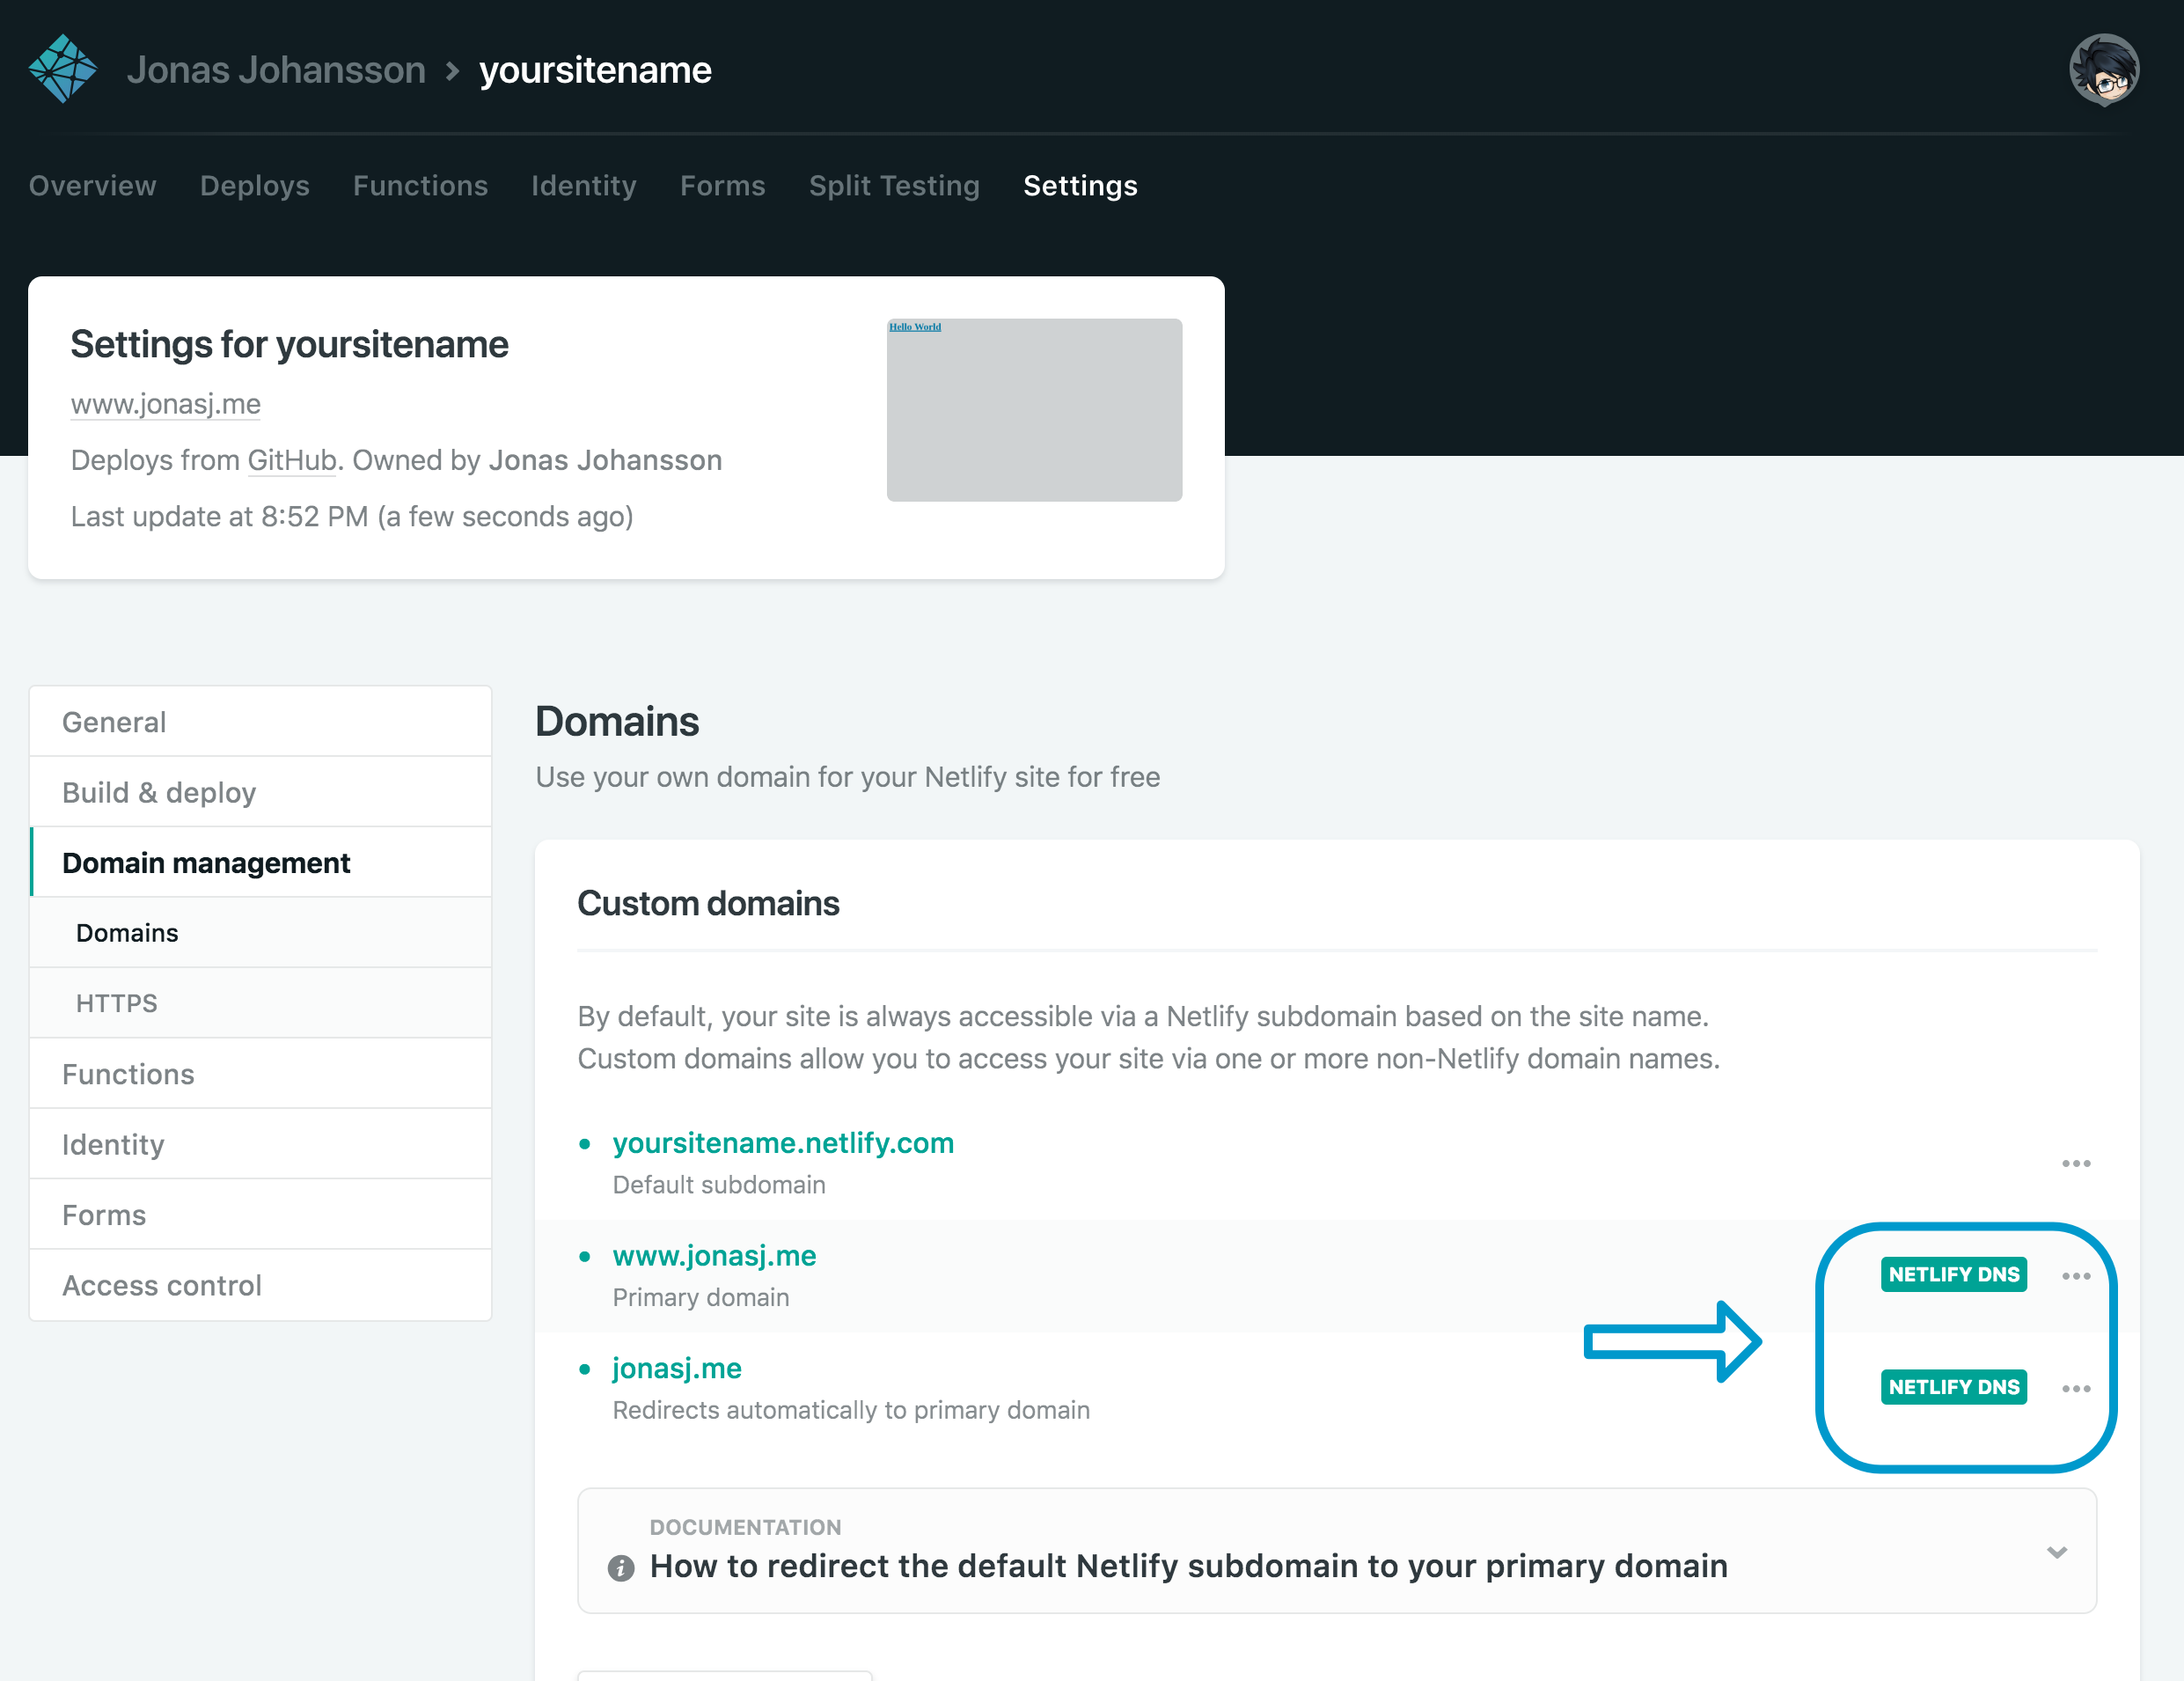
Then you will have to add Netlify’s DNS to your domain supplier. For Namecheap, which I’m using, it looks like this.

I just added four DNS addresses provided by Netlify. Now we wait for it to propagate, and we should see in our admin page that it’s now using Netlify’s DNS.
And there you have it, We created a website using the Hugo framework and Sass for styling then we deployed it with Github and Netlify.
Today we will get a bit more technical on how. I will write in a tutorial-like fashion, so if you never used Hugo and want to attempt it out, please follow along.
Read More